Whether writing down passing thoughts, making to-do lists, or taking notes during a meeting, the notes app on iPhone is a super handy tool for jotting down things
But what happens when you need to access those notes on your Mac?
That's where syncing comes in. With a few easy steps, you can access your notes on your Mac and streamline your workflow.
So, whether you're a student, entrepreneur, or working professional, here's how to make the most of this productivity hack.
Before you sync: getting organized with your notes
Before synchronizing your iPhone notes to your Mac device, ensure your notes are stored in iCloud.
You can store the notes on your iPhone, iCloud, or other email addresses linked to the phone.
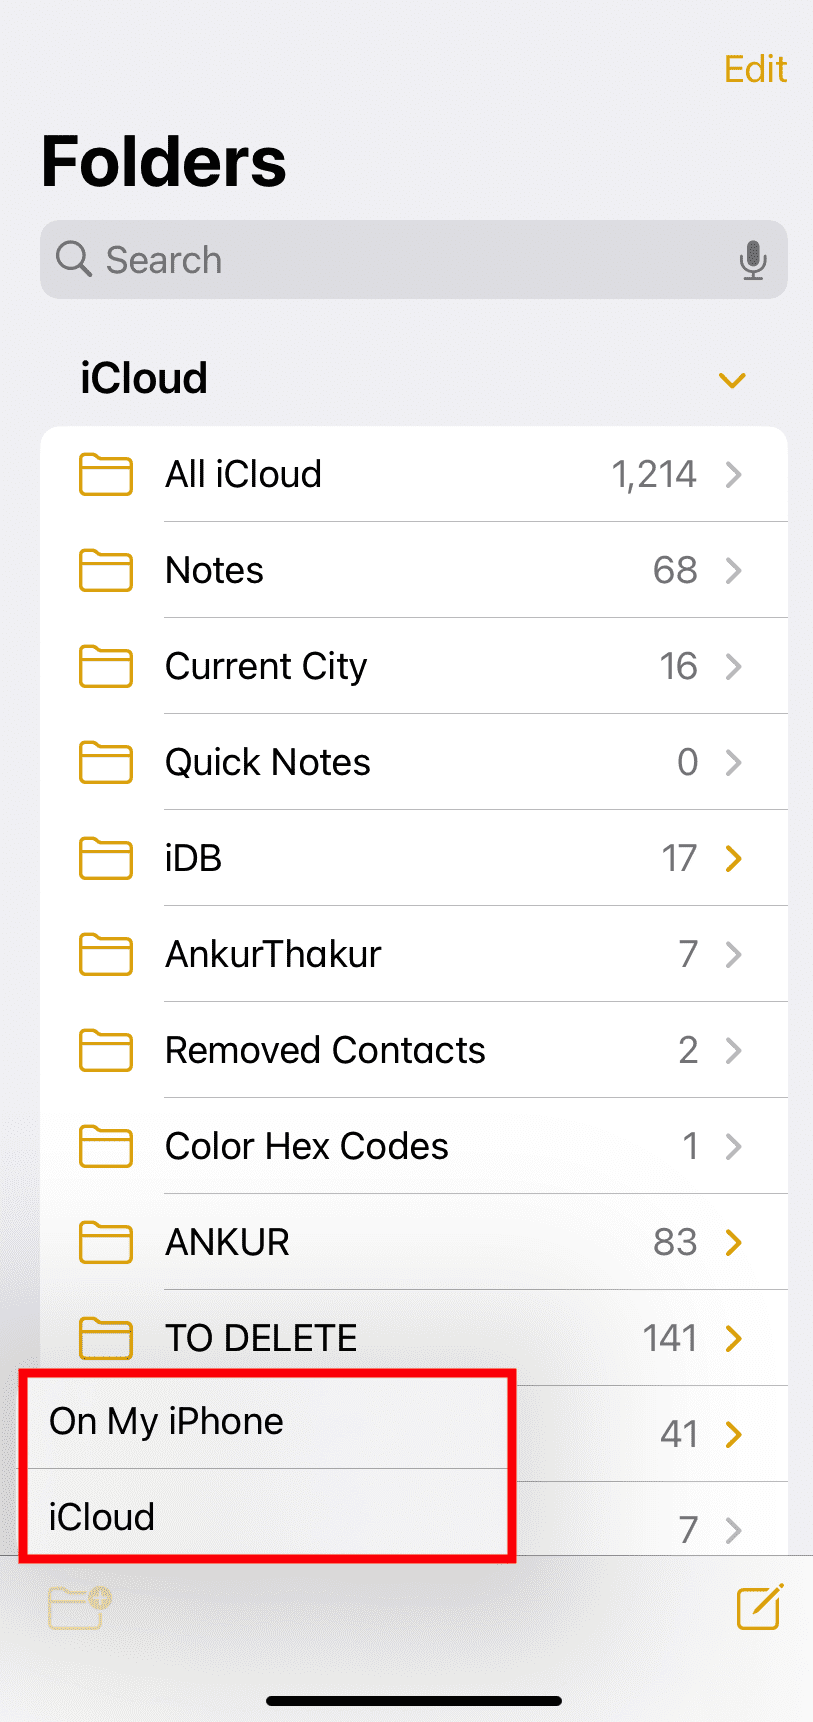
Go to the Folders page to find the list of accounts that store your notes.

Note: If you've never synced your notes to other accounts, you'll find the notes in On My iPhone in the Folders page.
However, keep your notes in iCloud to sync them with your Mac.

Syncing notes from iPhone to Mac via iCloud
iCloud is one of the key features of Apple. It can synchronize information, like photos, messages, and notes. It lets you connect and access the same information on all your Apple devices.
Here's how you go about importing notes via iCloud.
Step 1: Ensure iCloud note syncing is turned on for iPhone
- Go to your iPhone's 'Setting' panel, select your user name, and tap the iCloud icon.
- Enable the Notes option.
- Doing this will synchronize your Notes to your iCloud.
Accordingly, all your iPhone notes will now automatically synchronize to the iCloud account.
Step 2: Ensure iCloud syncing for notes is turned on Mac
After you change your iPhone setting, do the same on the Mac device to ensure you can retrieve your notes.
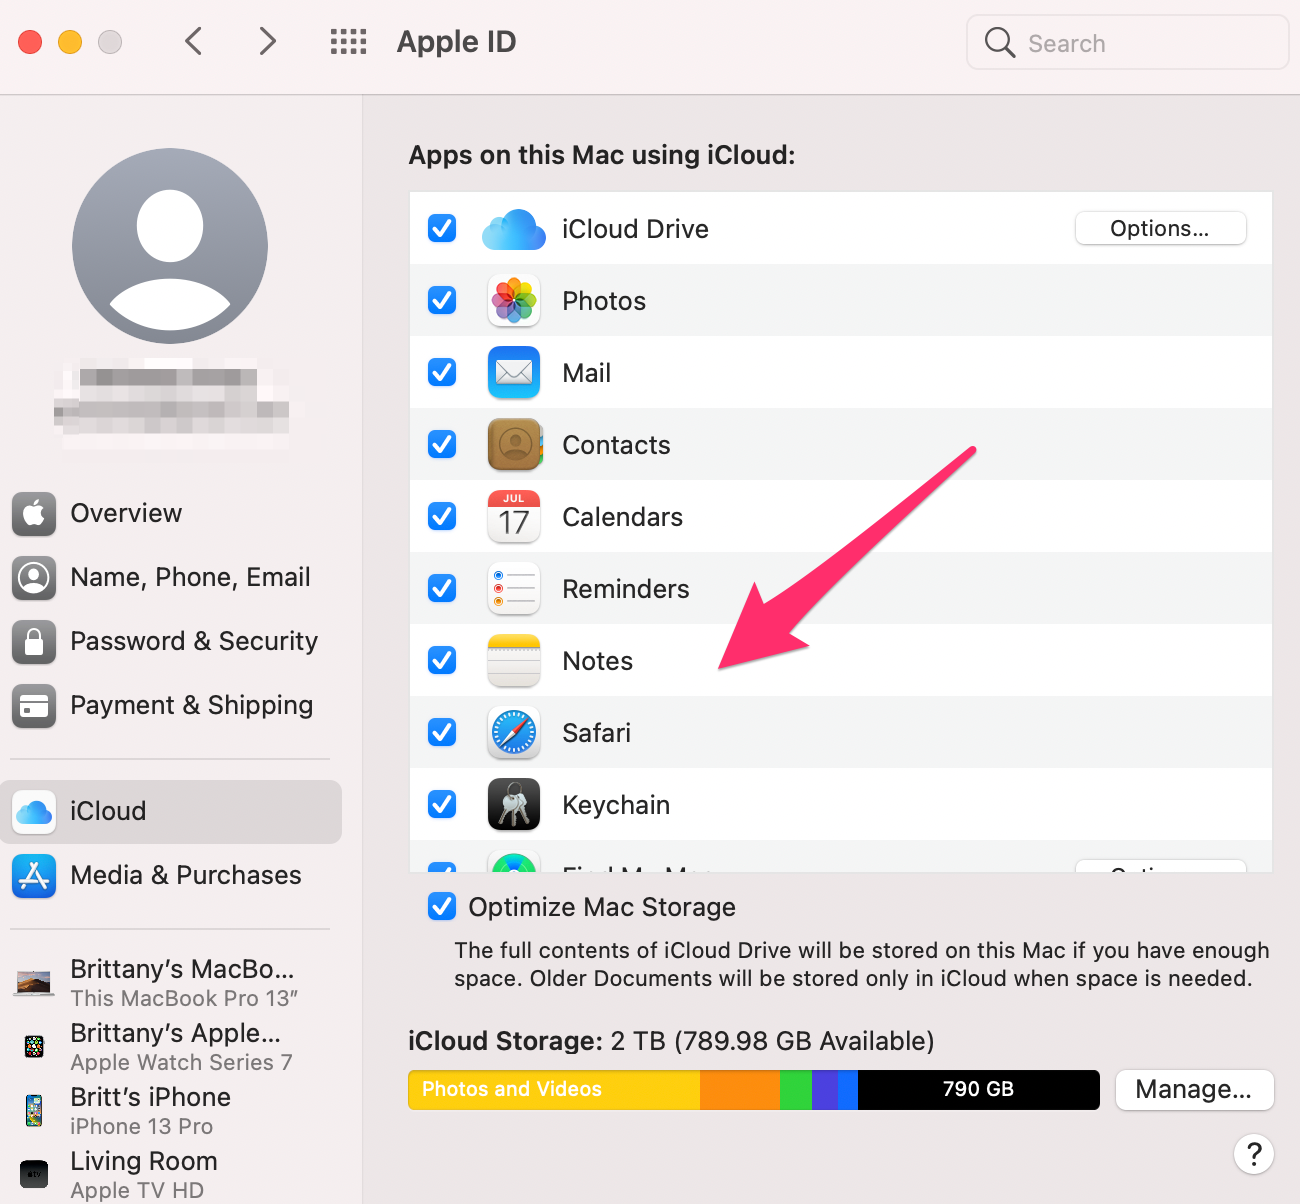
- Go to System Preferences on the Mac, open the iCloud app, and log in using your iCloud account.

- Enable the Notes option in the iCloud settings by clicking the check box.
Once you've done this, your notes will automatically begin syncing from your iPhone to your Mac.
Alternative ways to transfer notes from iPhone to Mac
Via Email App
If you only want to transfer a few of your notes, a simple way is by emailing them to yourself and then saving them from your desktop email to your Mac. Here's how to do it:
- Open your Notes app and then select a note.
- On the top right, you'll see a Share icon. Click it.
- Next, click the Mail icon.
- Type in your email address and then download notes to the Mac.
Via AirDrop
Another super convenient way to transfer a few notes to your Mac is through Airdrop if you are close to your computer. Here's how you can do it:
- Go to Control Center and make sure AirDrop is turned on for both the Mac and iPhone.
- On the Allow me to be discovered by page, enable Everyone to ensure other devices can detect yours.
- Open the Notes app and pick the note you want to transfer.
- Click the AirDrop tab on the right side and send notes by selecting the target Mac.
- Next, go to your Mac device and tick the Accept option to get the notes from your iPhone.
Maximizing your note-taking potential with automation
So, as we can see, technology has made note-taking during meetings a breeze. Nowadays, all you need is your trusty iPhone to jot everything down.
But what about when it comes to work and meetings?
💡 Fireflies Tip
Try our AI-powered note-taker that lets you streamline and automate your entire note-taking process.
You don't want to be the person on your phone trying to write everything down in your iPhone notes app while the rest of the team thinks you're scrolling through social media!
That's where Fireflies.ai comes in. Fireflies can take care of the note-taking for you automatically while recording, summarizing, and transcribing your meetings and providing insights and action items.
With this kind of help, taking notes has never been easier!


