
Do you want to make your YouTube videos more accessible and rank better in search results?
Adding a transcript to your video achieves both goals!
Transcripts help viewers understand your content—especially those with hearing impairments or who speak a different language.
If you’re wondering how do I add transcripts to my YouTube videos, this article is for you.
Let’s dive in.
How to add a transcript to a YouTube video
Before you start adding subtitles to your videos, follow these steps:
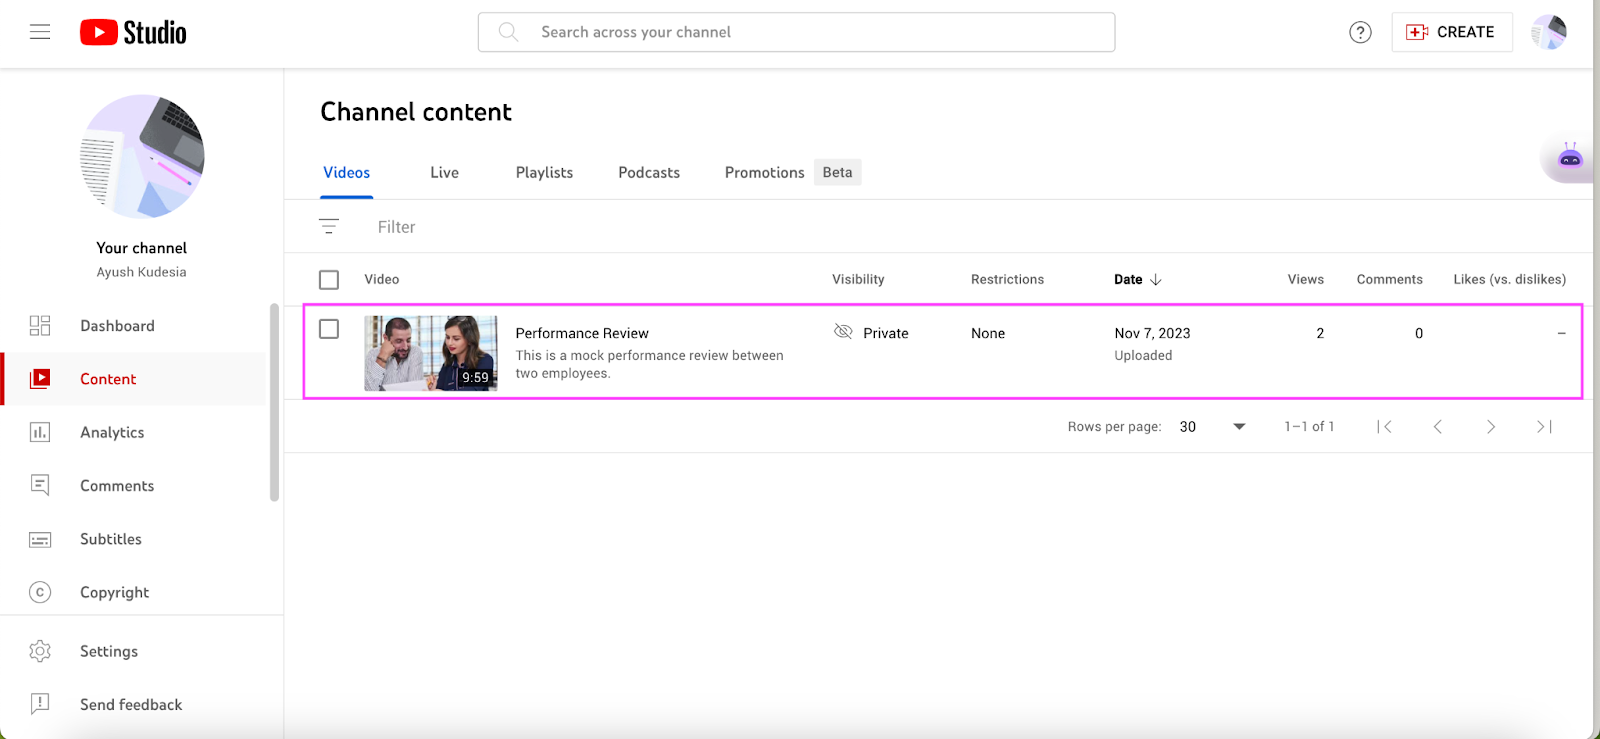
Step 1: Log in to YouTube Studio.
Step 2: Select a video to add subtitles (or upload a new one).
Step 3: Select the language of your video under Video details.
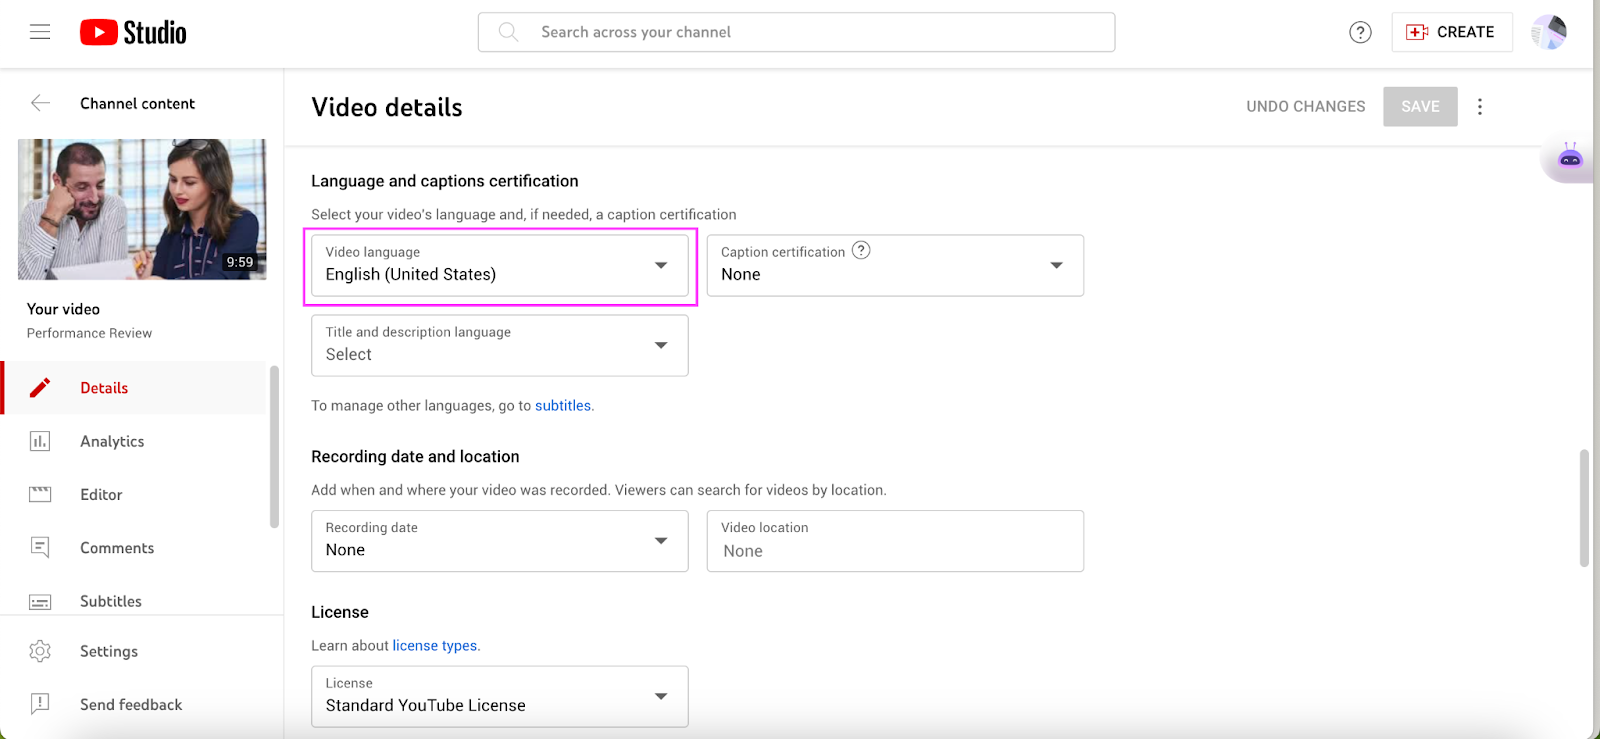
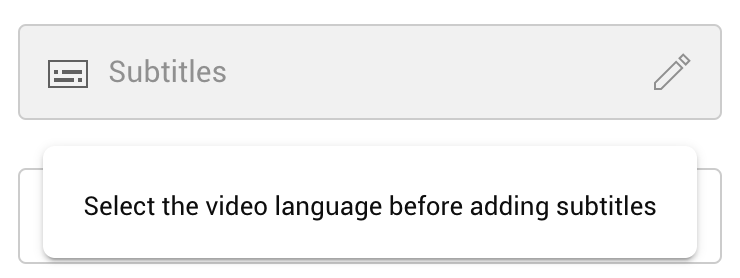
Note: YouTube requires you to set a video language before you can add subtitles to your video.
Now that your basic settings are set, here’s how to add a transcript to a YouTube video.
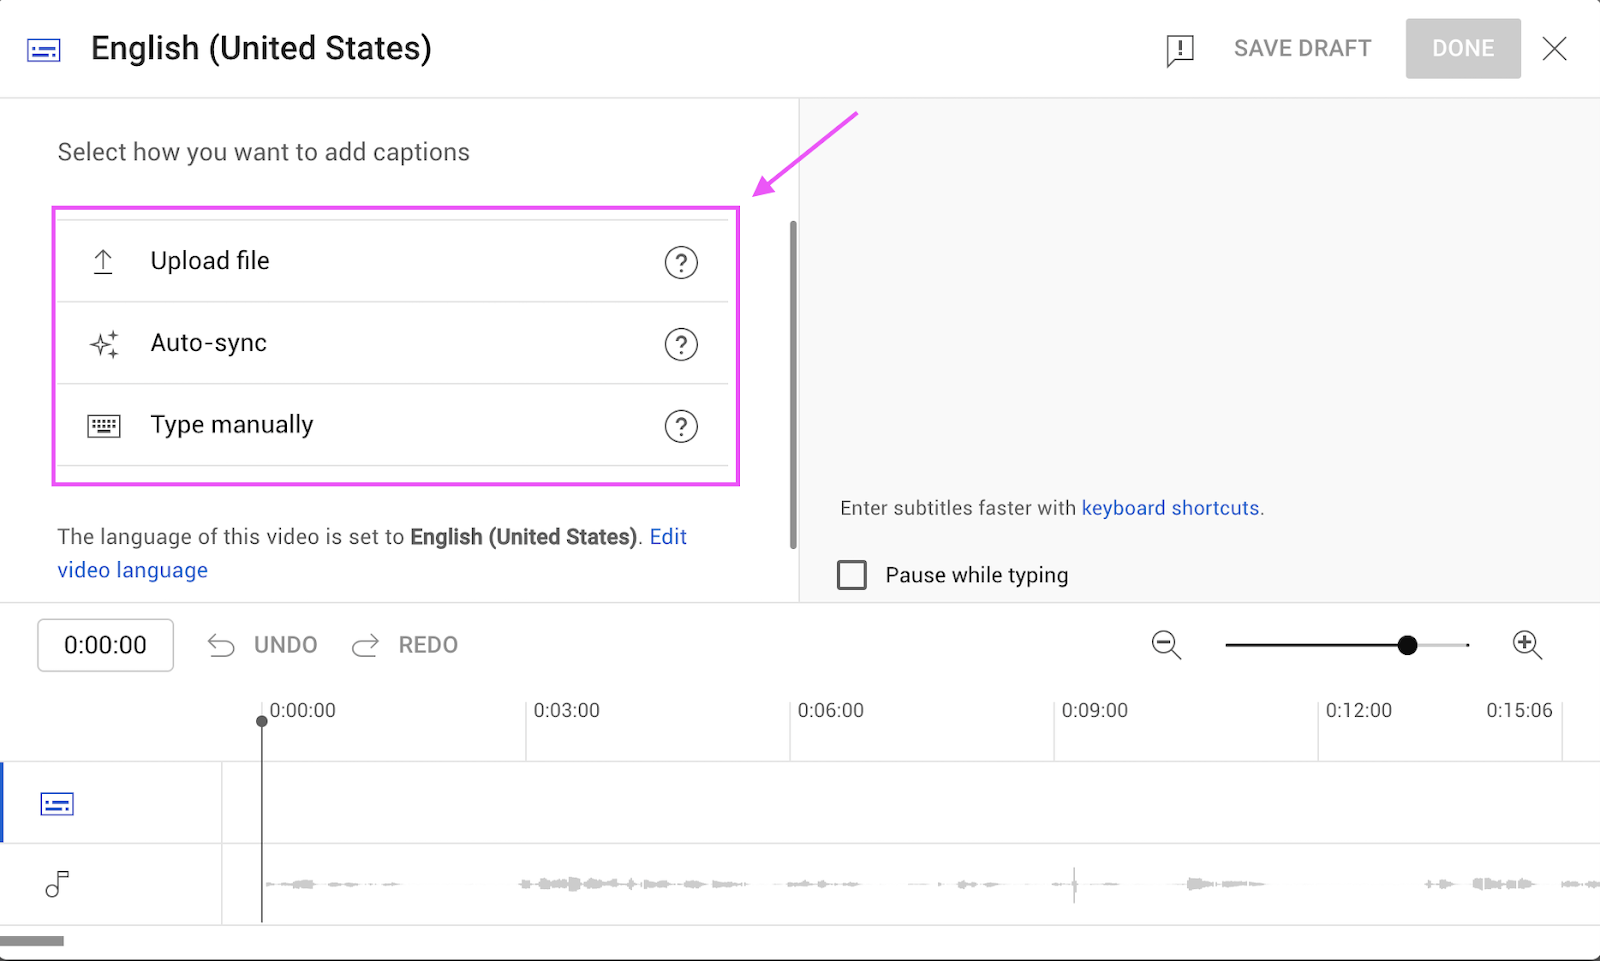
There are three ways to add transcripts to YouTube videos:
- Type subtitles manually
- Auto-sync your video script
- Upload subtitle file
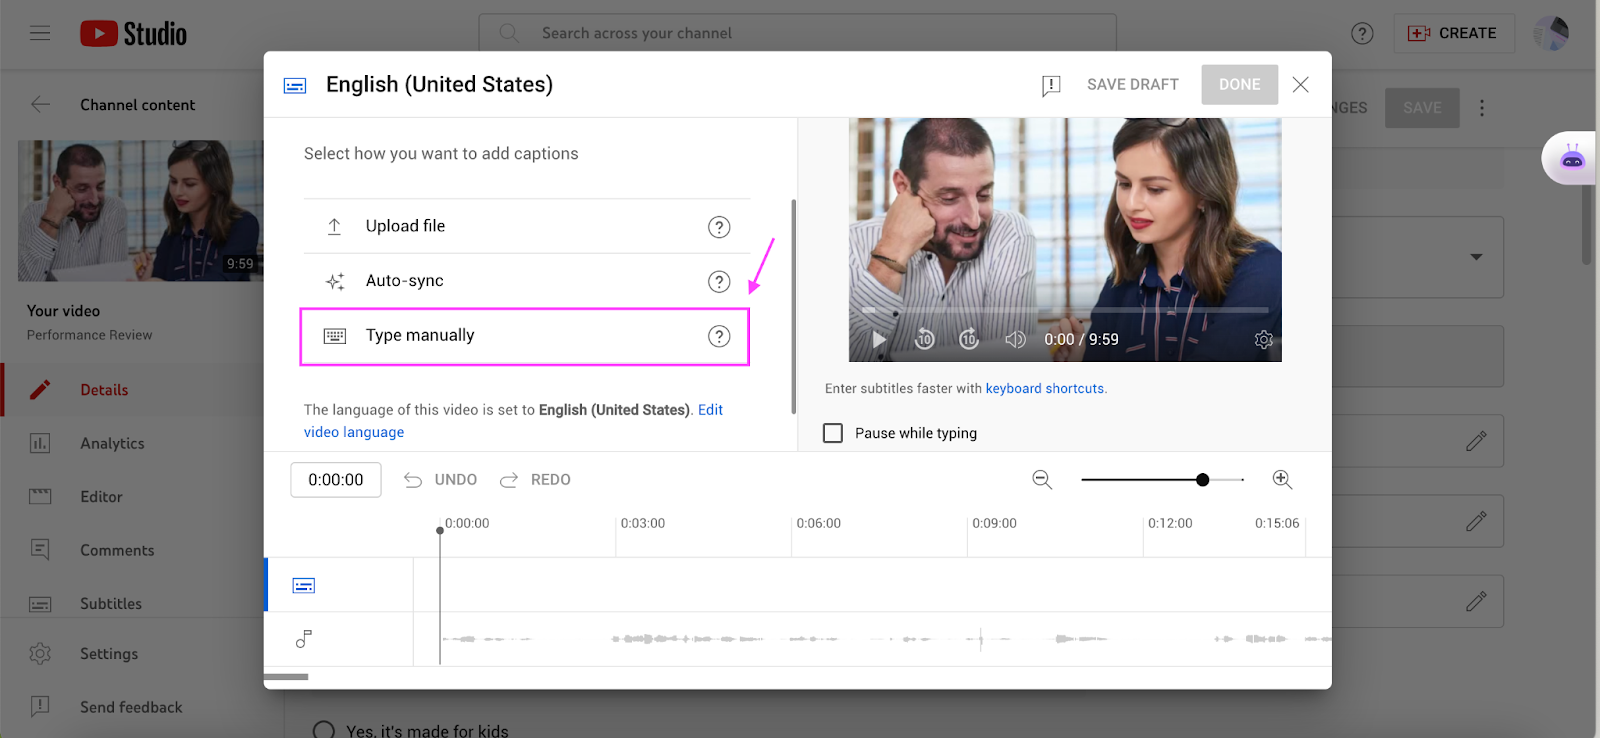
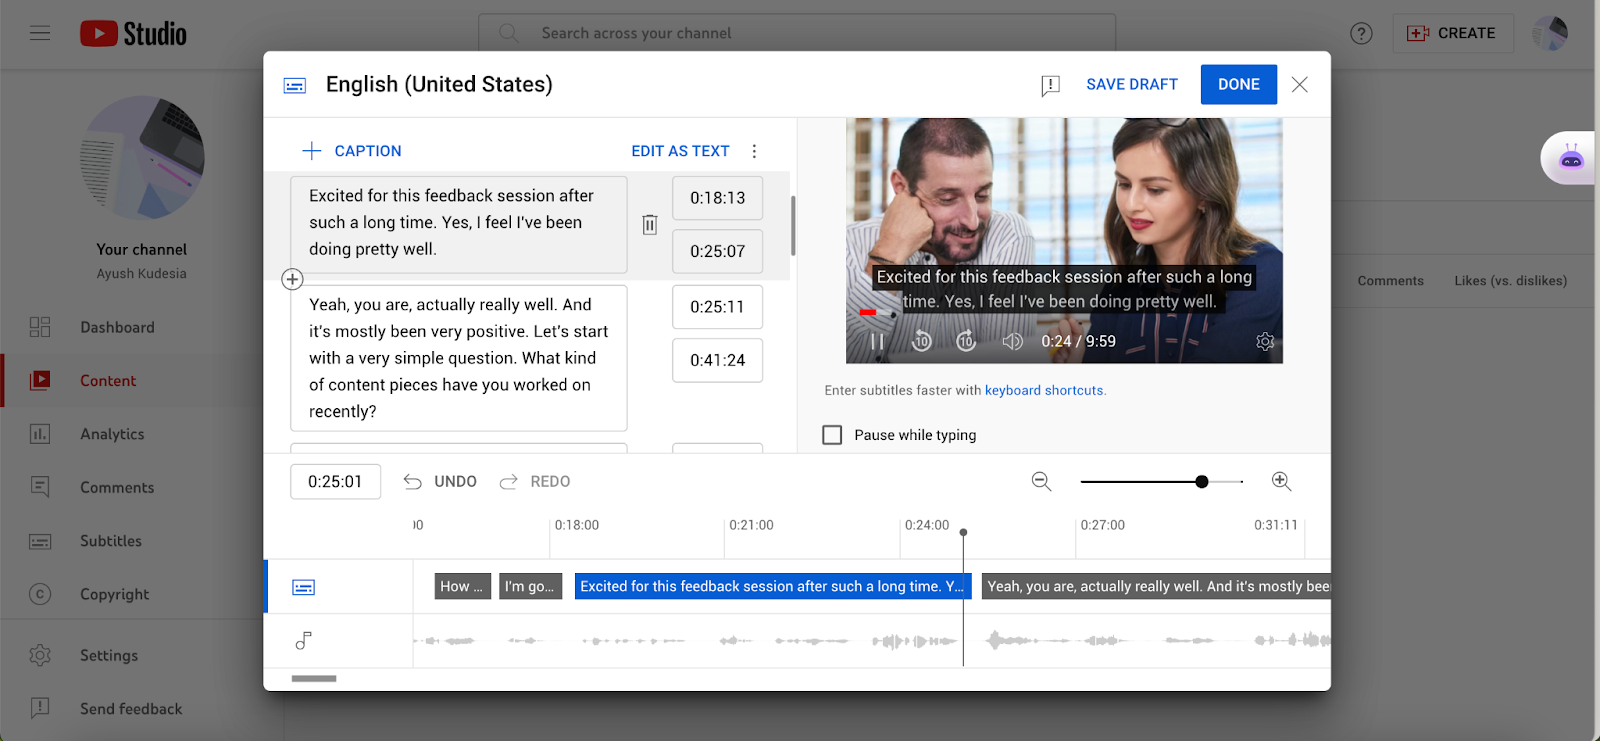
1. Type subtitles manually
One of the easiest ways to add a transcript to a YouTube video is by manually typing subtitles in YouTube Studio. Here's how:
Step 1: Open the subtitles tab and click on Type manually.
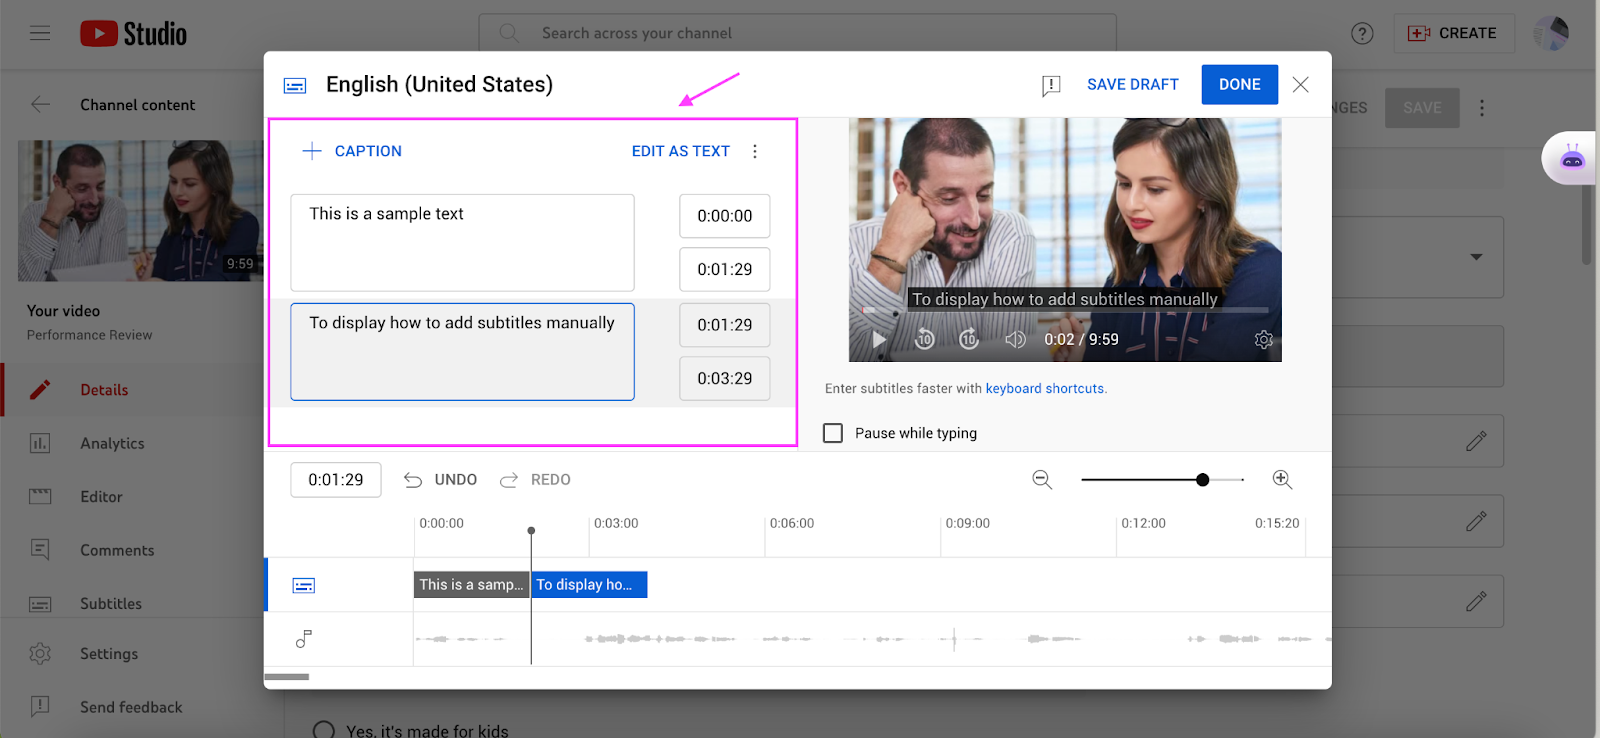
Step 2: Start typing your subtitles.
You can play/pause the video and type your captions side-by-side.
Add proper timestamps for each subtitle so they sync with the audio.
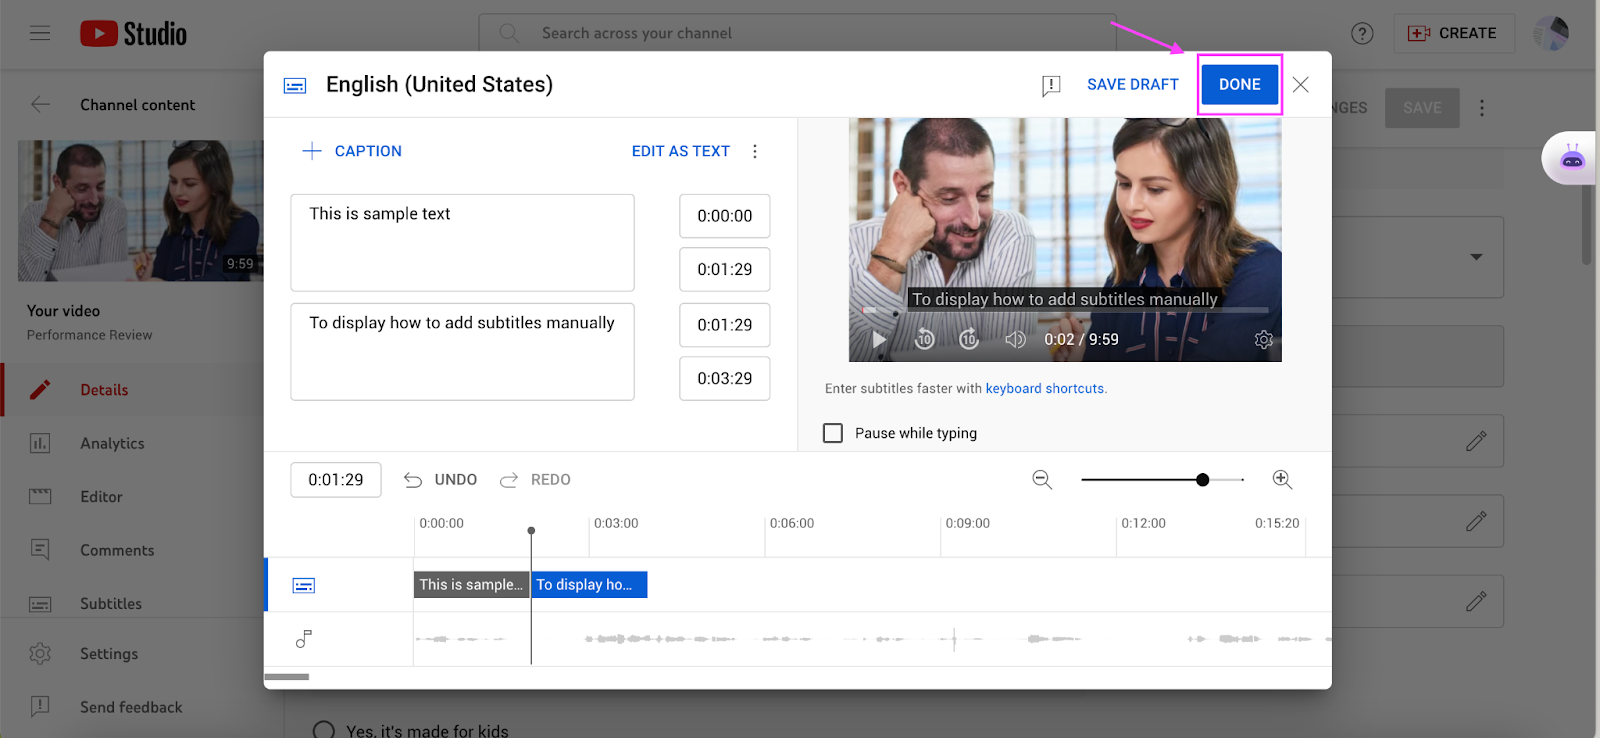
Step 3: Click Done.
Once you finish typing the transcript, click Done.
2. Auto-Sync your video script
If you already have a script of your video, you can auto-sync it to generate timed subtitles. Here’s how:
Step 1: Open the subtitles tab and click on Auto-sync.
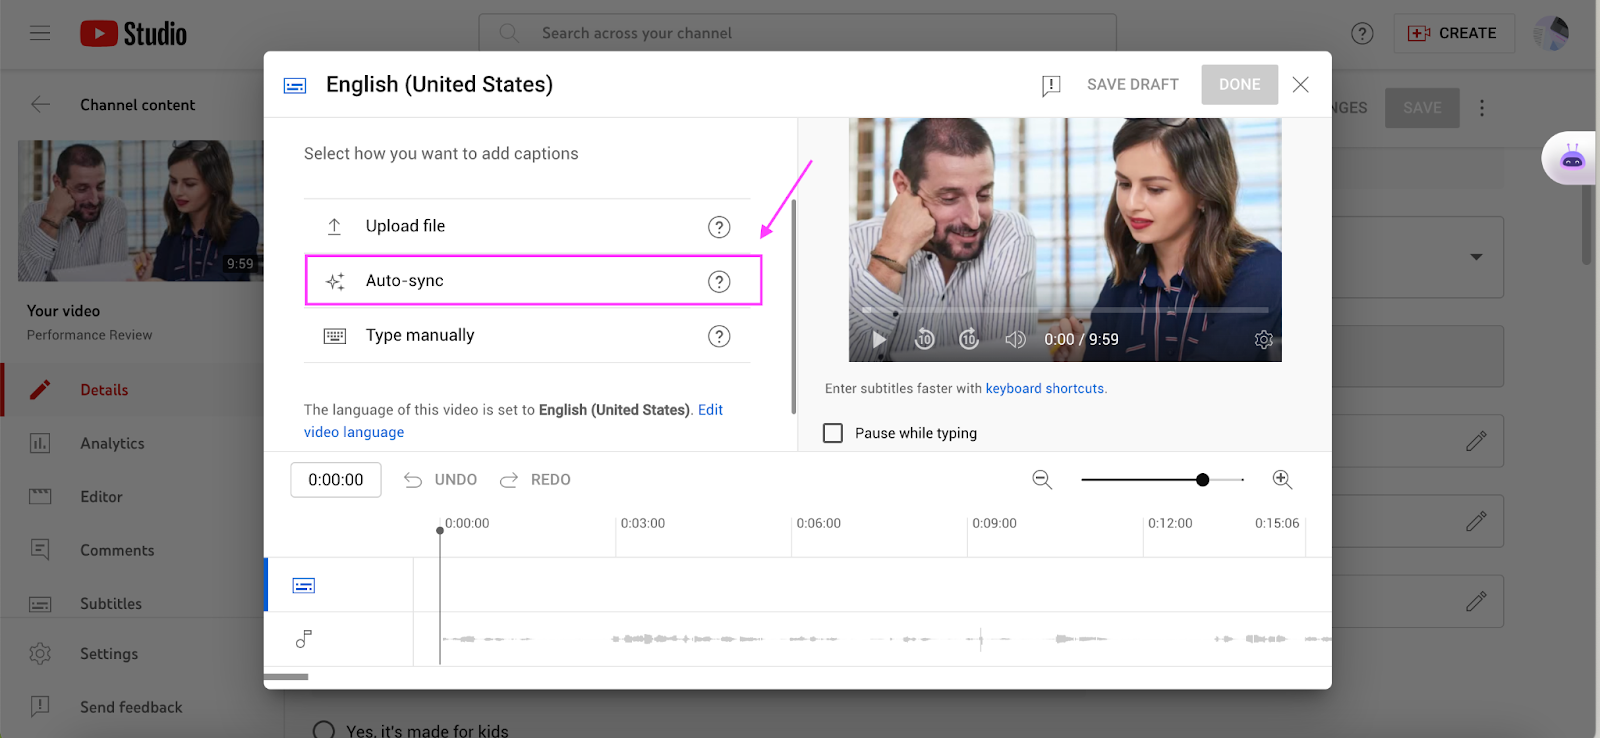
Step 2: Paste your full transcript and click Done.

YouTube will automatically sync the transcript to match the timing of the audio.
Carefully review and edit the auto-synced subtitles for any errors in timestamps.
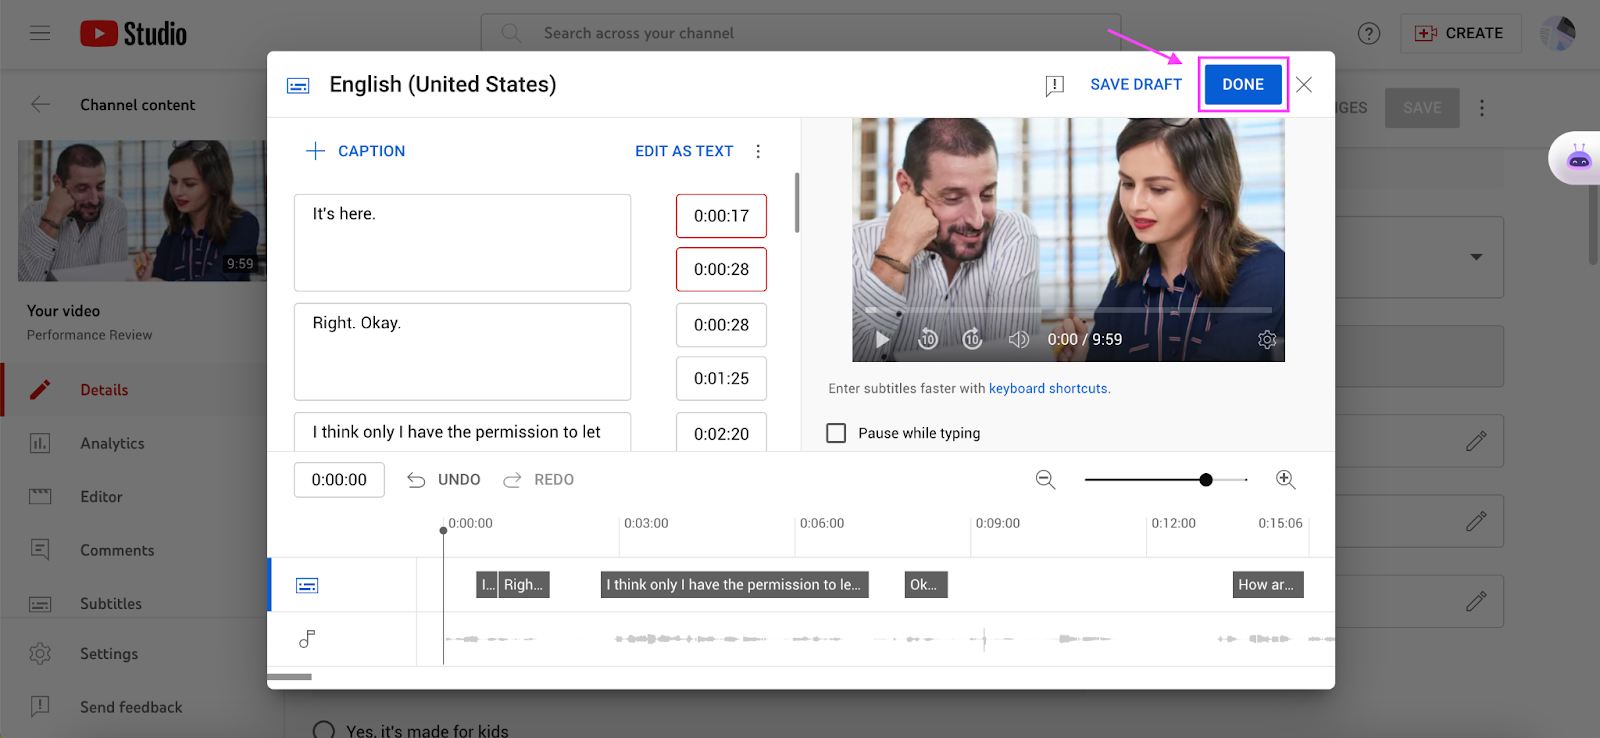
3. Upload subtitle file
Another way to add transcripts to YouTube videos is by uploading time-stamped subtitles like .srt files. Here’s how to do that:
Step 1: Open the subtitles tab and click on Type manually.
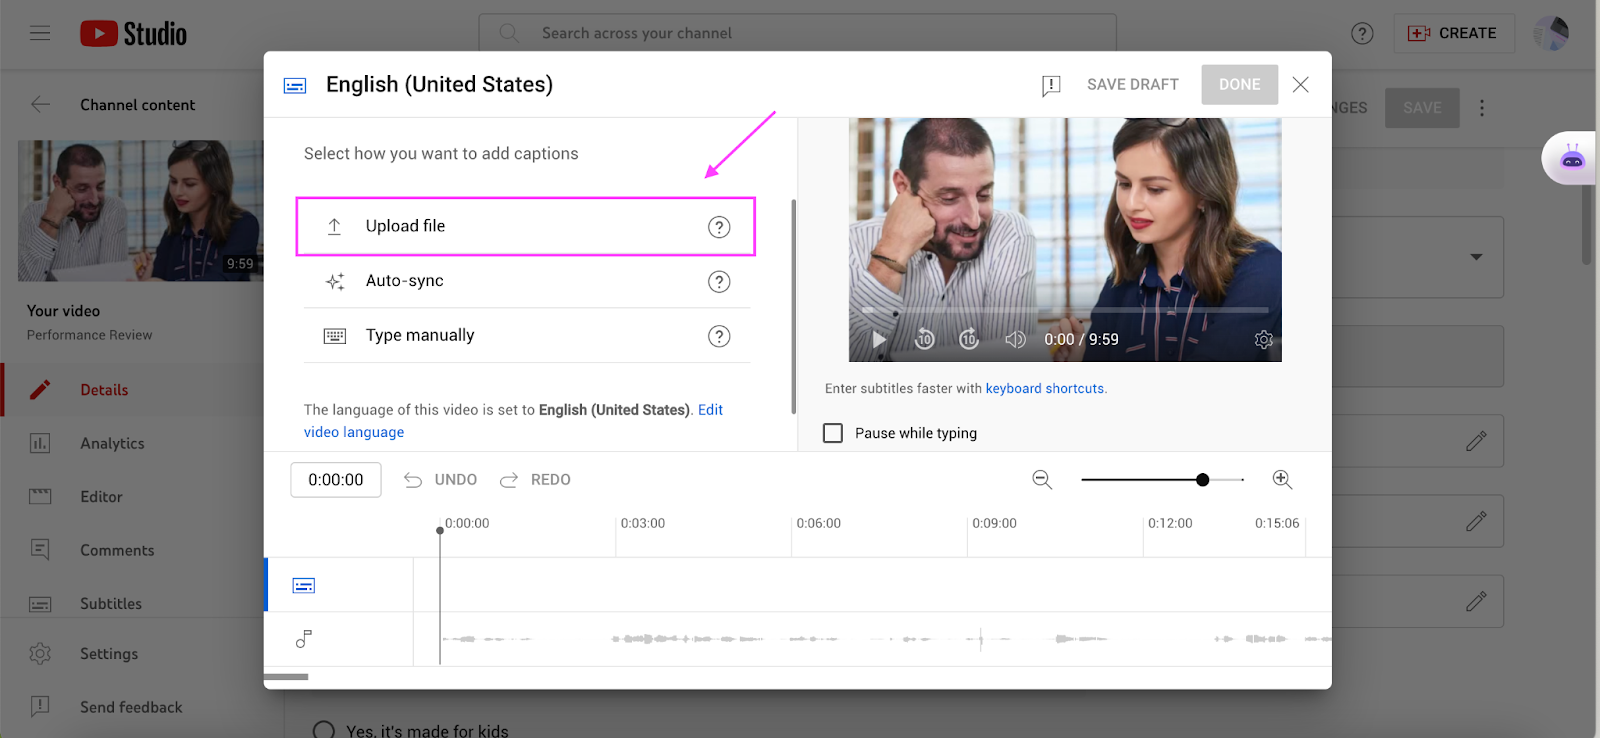
Step 2: Choose With timing.
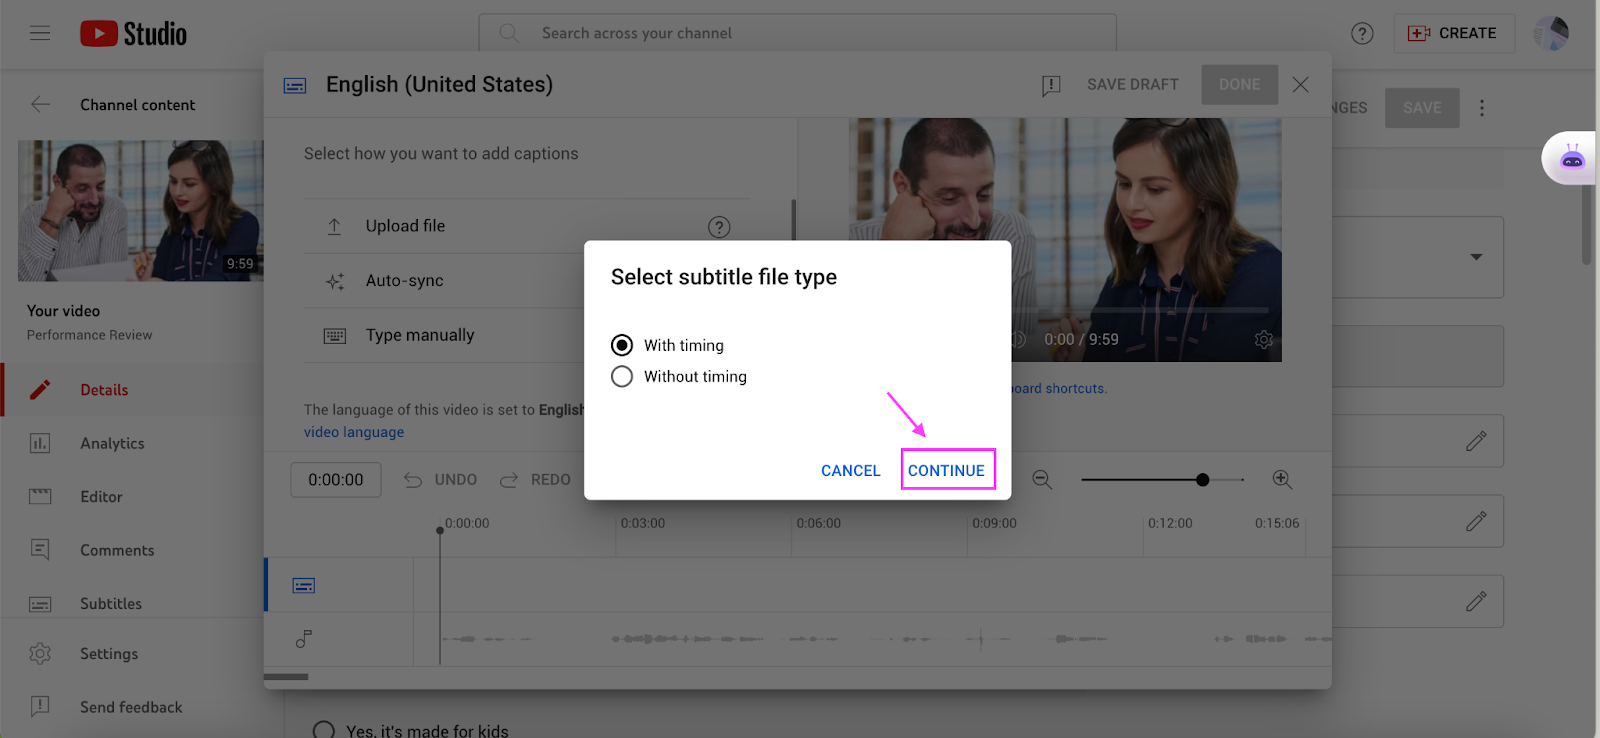
Step 3: Choose your subtitle file and open it.
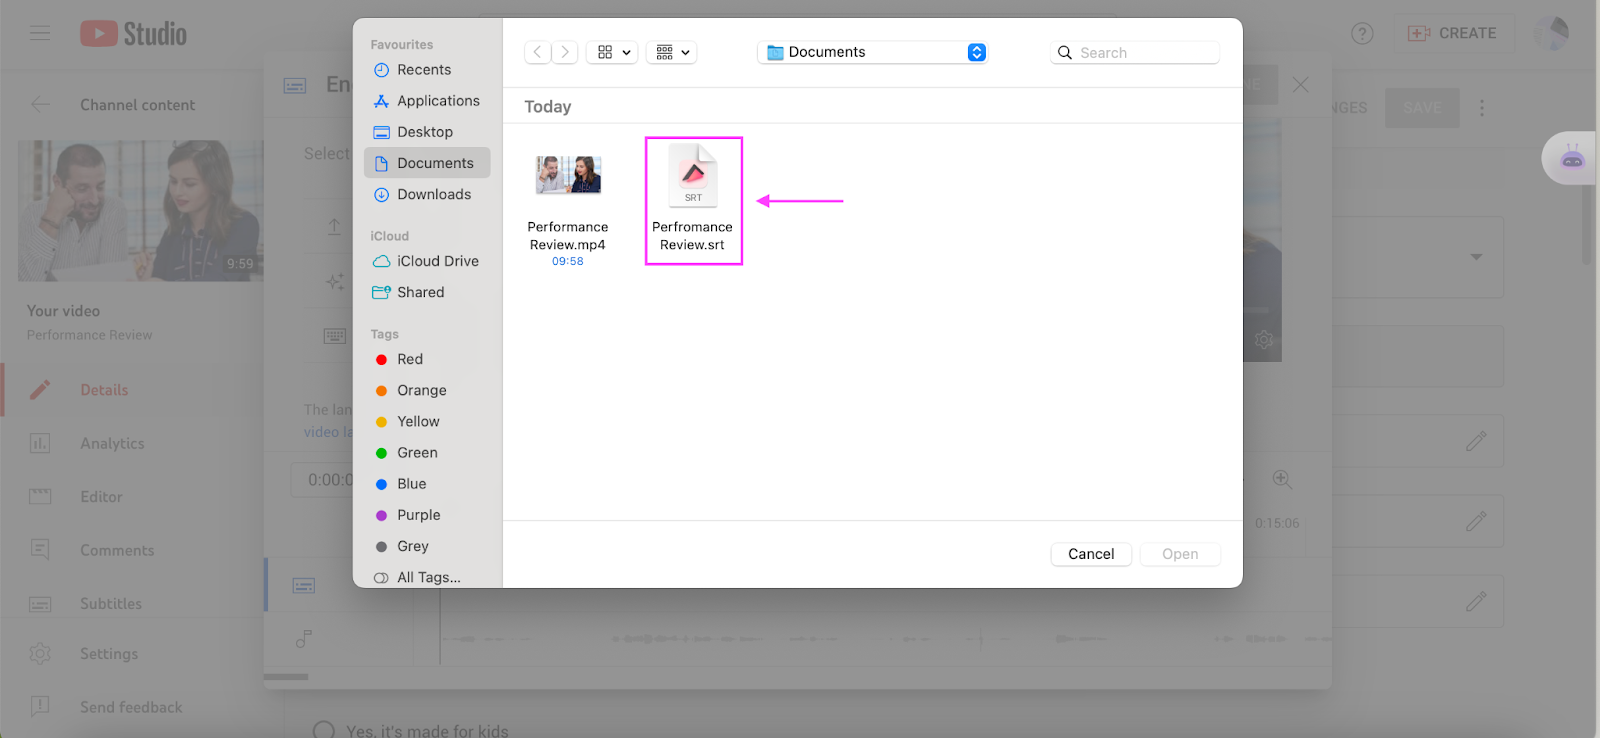
YouTube will process the file and add the subtitles to your video.
Step 4: Review and publish the uploaded subtitles by clicking Done.
Use Fireflies.ai to generate accurate transcripts for YouTube
Uploading a subtitle file is the best and the fastest way to add accurate subtitles to your YouTube videos.
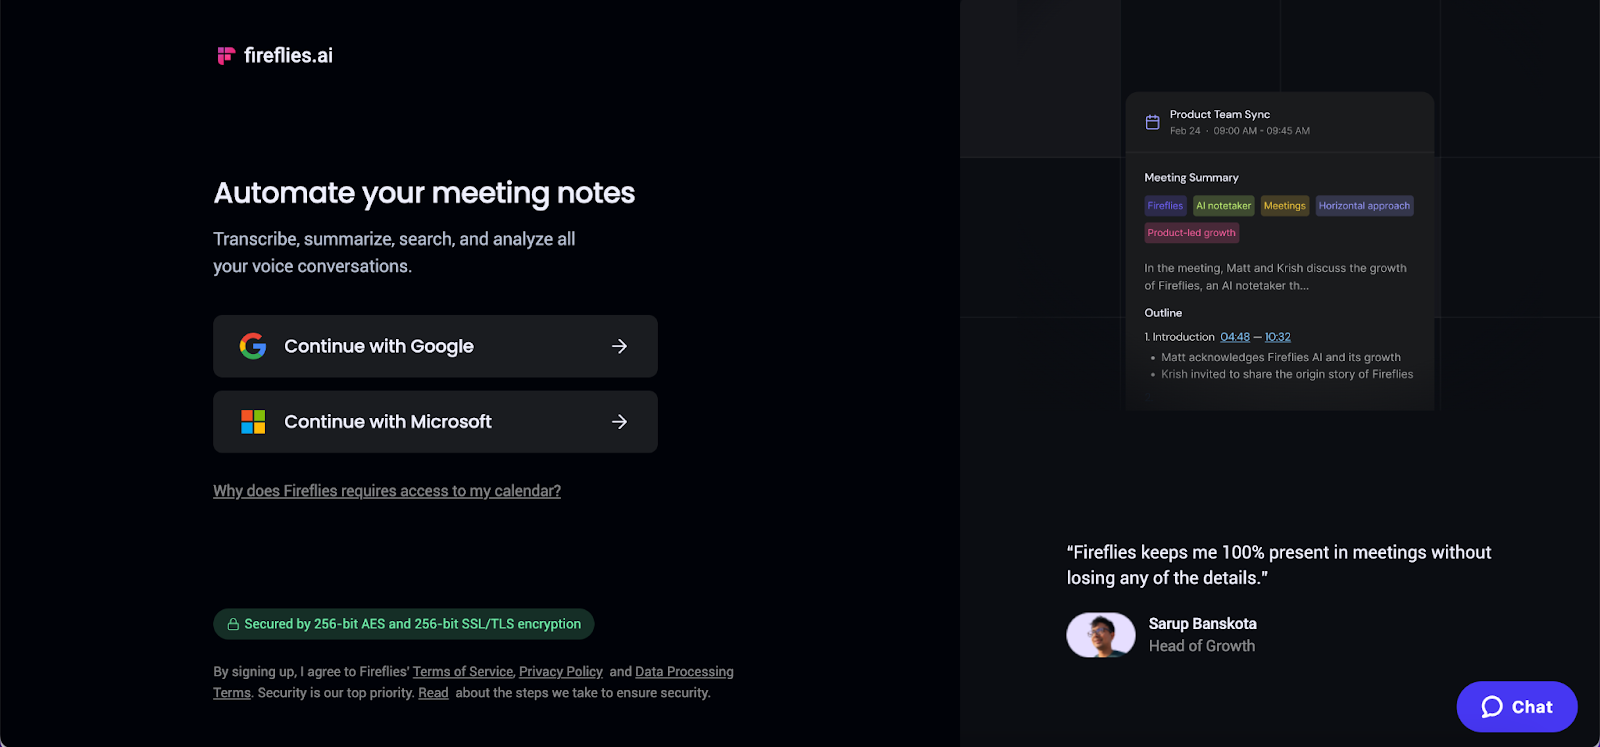
Meet Fireflies.ai, your go-to tool for creating spot-on video transcripts. Fireflies simplifies the transcription process, ensuring accurate results without breaking the bank.
The benefits of using Fireflies for YouTube transcription:
- Much higher accuracy than YouTube’s auto-generated captions.
- Faster turnaround time than human transcription services. Get your transcripts within minutes after uploading the video or audio.
- Supports over 60+ languages, including Portuguese, Spanish, French, Arabic, German, Dutch, and Italian.
- Advanced speaker identification separates each speaker's lines.
- Affordable pricing. Unlimited transcription with 8,000 minutes of storage starts at just $10/month.
How to generate transcripts for YouTube with Fireflies
Step 1: Log in or sign up to Fireflies using a Google or Outlook account.
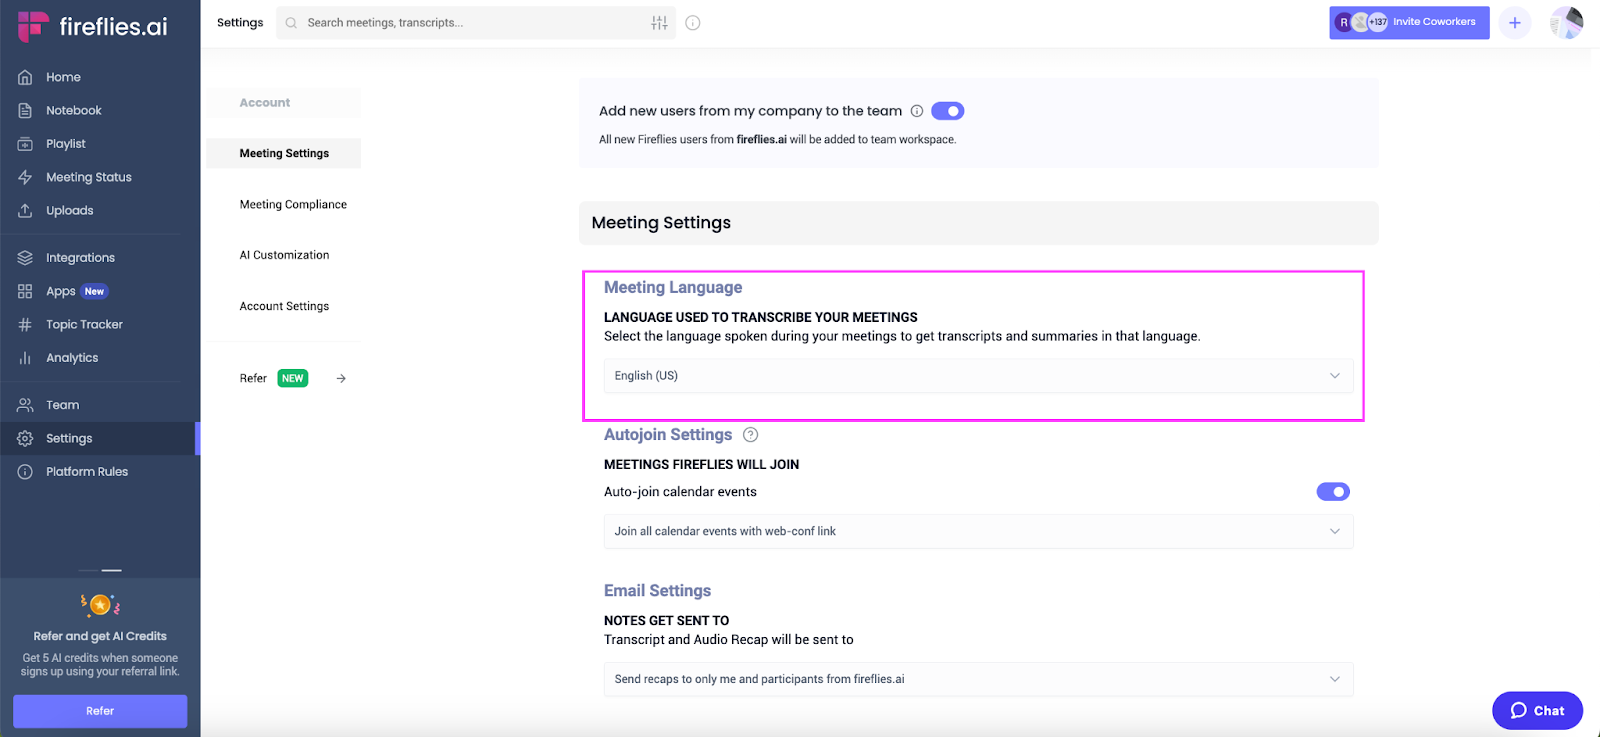
Step 2: Go to Settings from the navigation menu on the left and select your Meeting Language.
Make sure you select the same language as your video.
Step 2: Click Transcribe audio or video on the bottom right corner of the Dashboard.
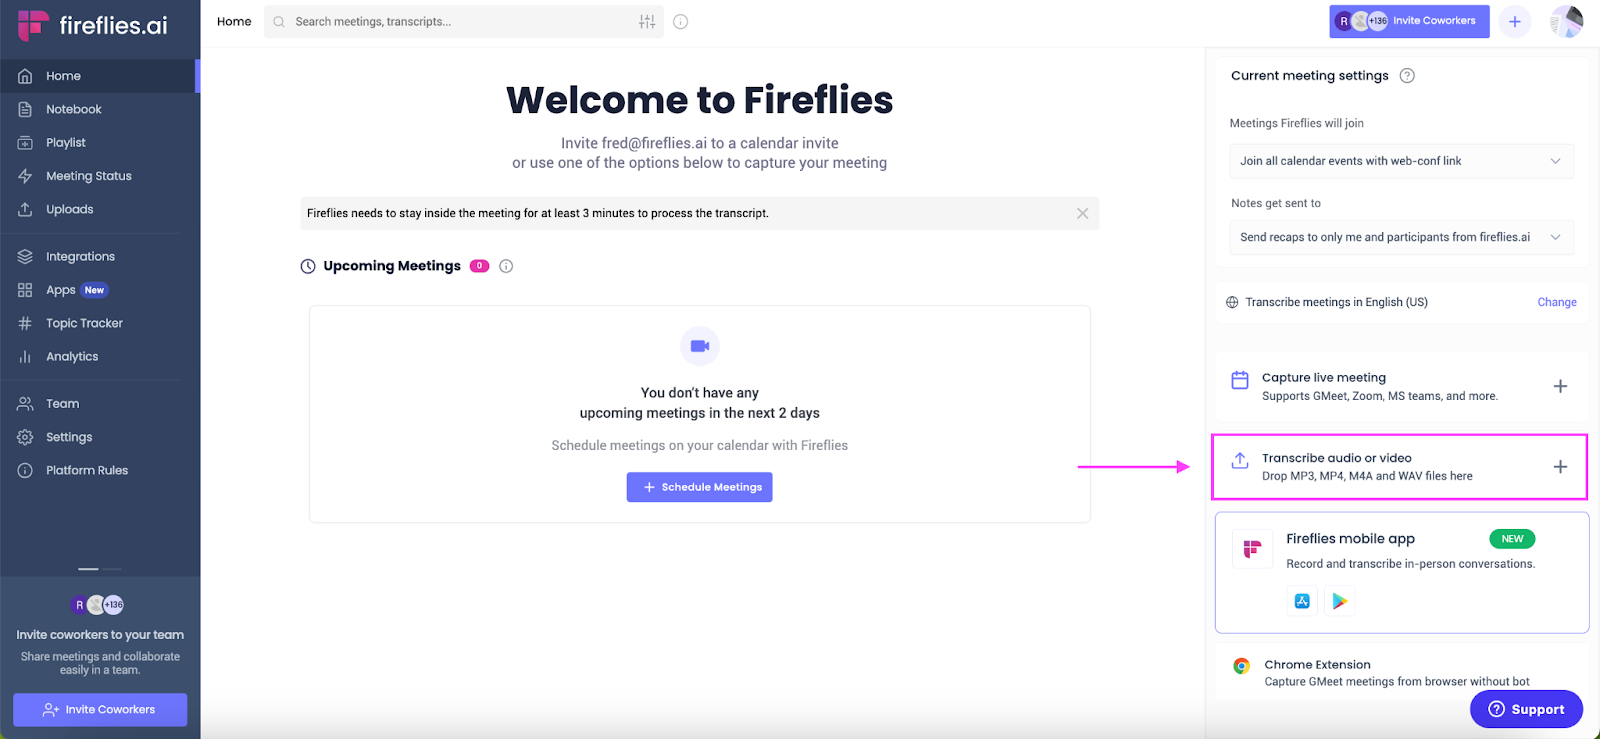
Step 3: Select your video or its audio file to upload.
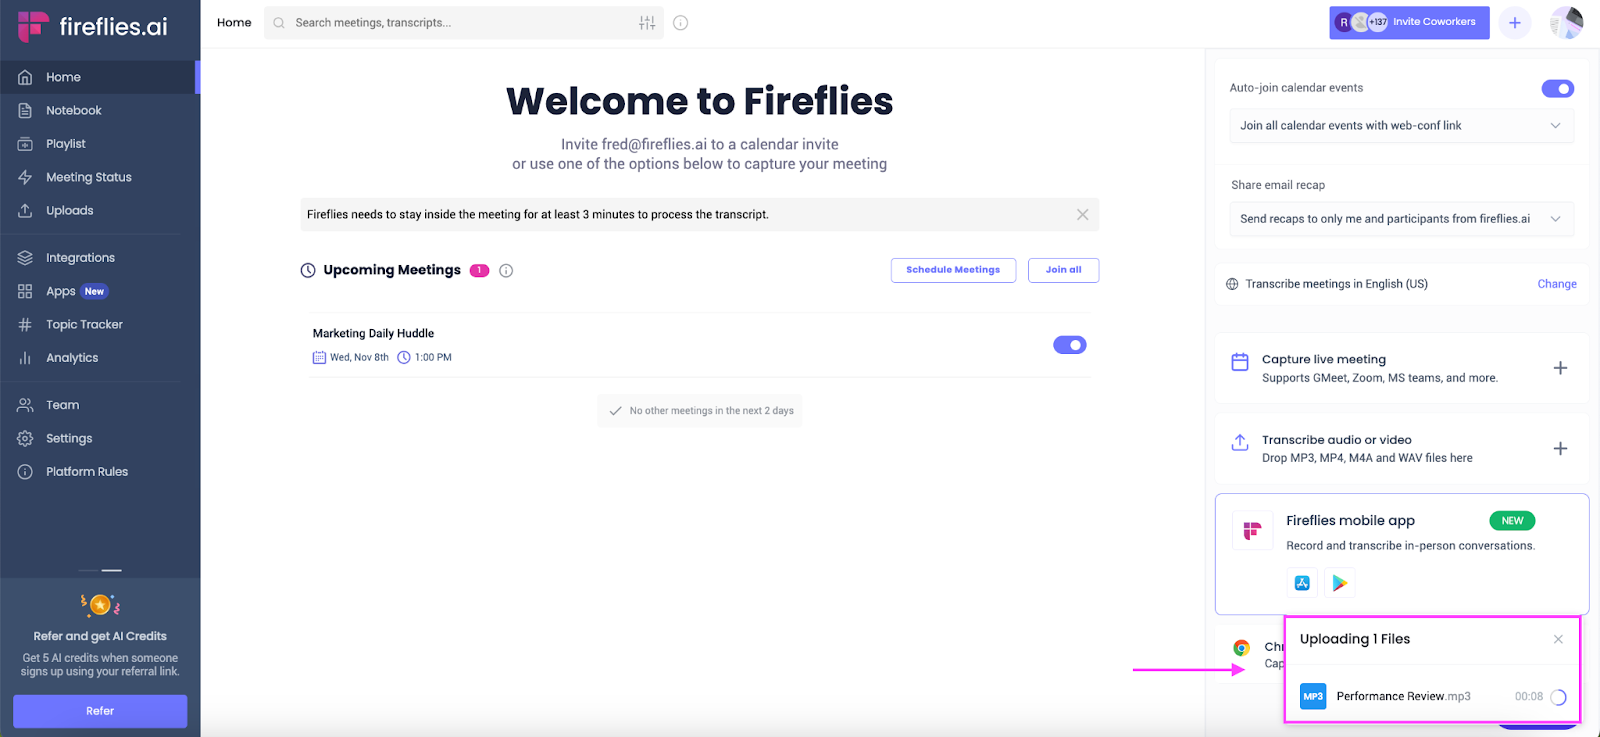
Wait for a few minutes for Fireflies to process the video. To check its status, go to Meeting Status from the navigation bar on the left.
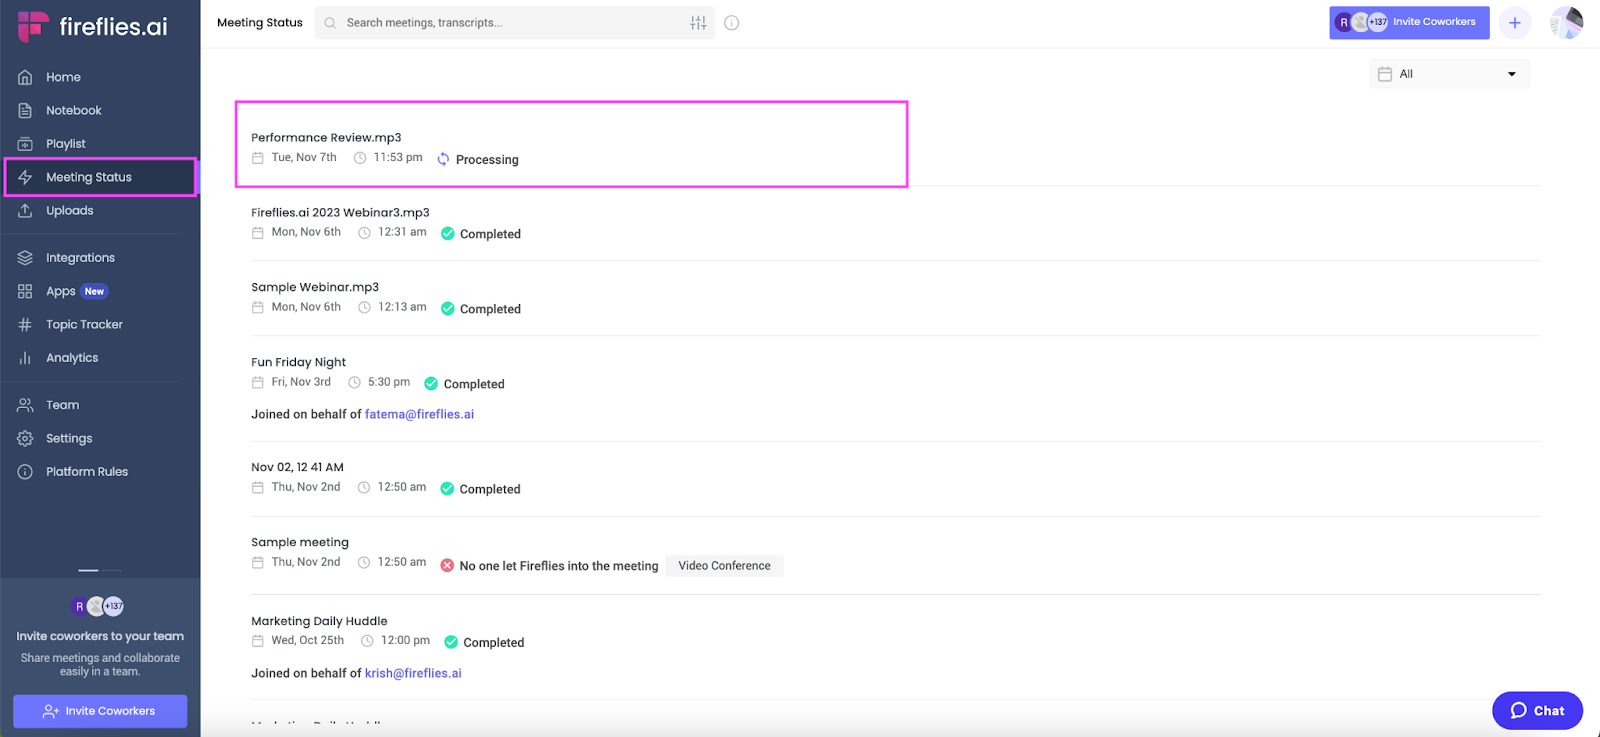
Once done, you’ll receive an email with a link to your transcript.
Step 4: Review the transcript and make any necessary edits.
Fireflies' transcripts are over 90% accurate.
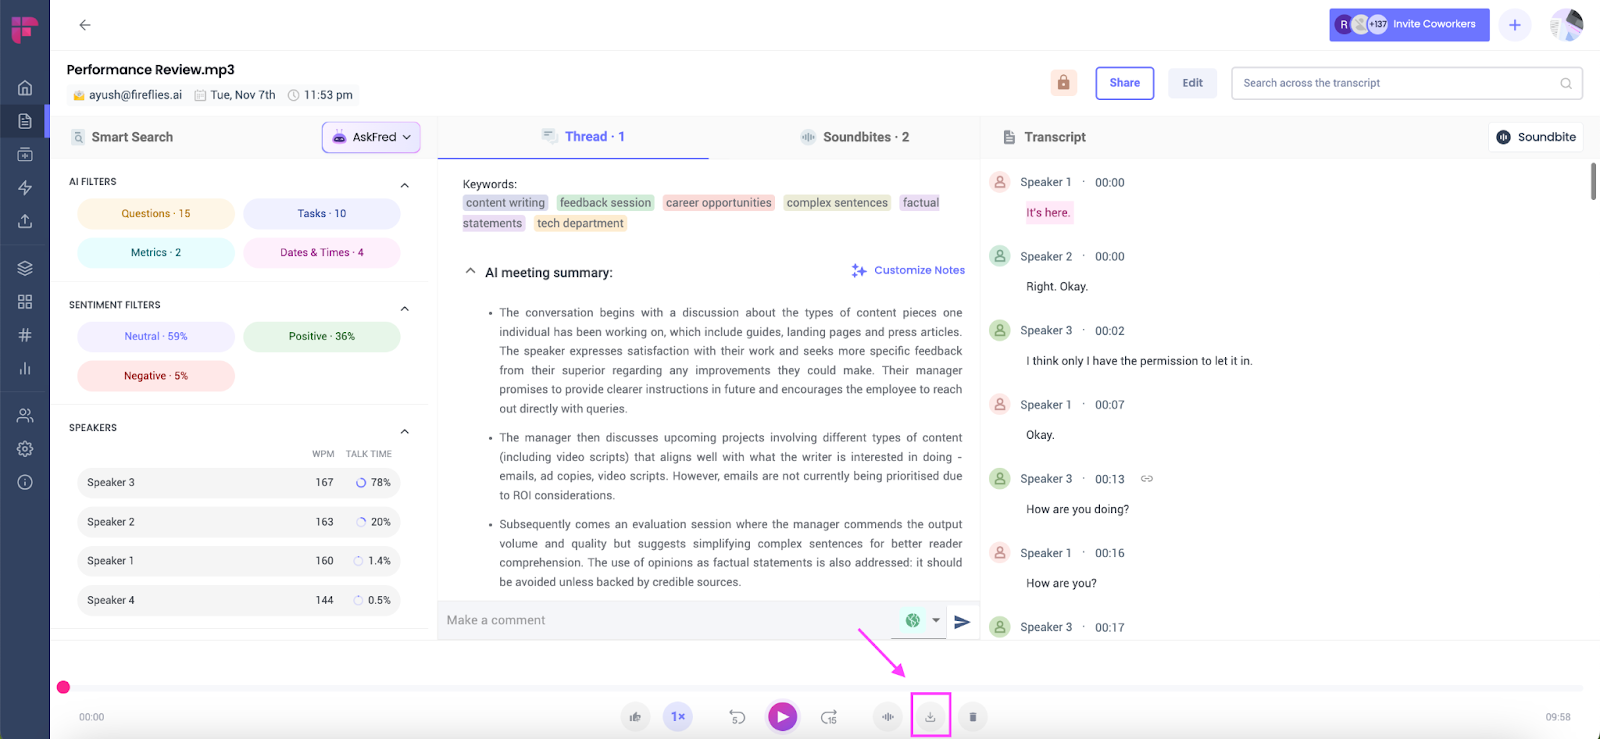
Step 5: Click the download button at the bottom.
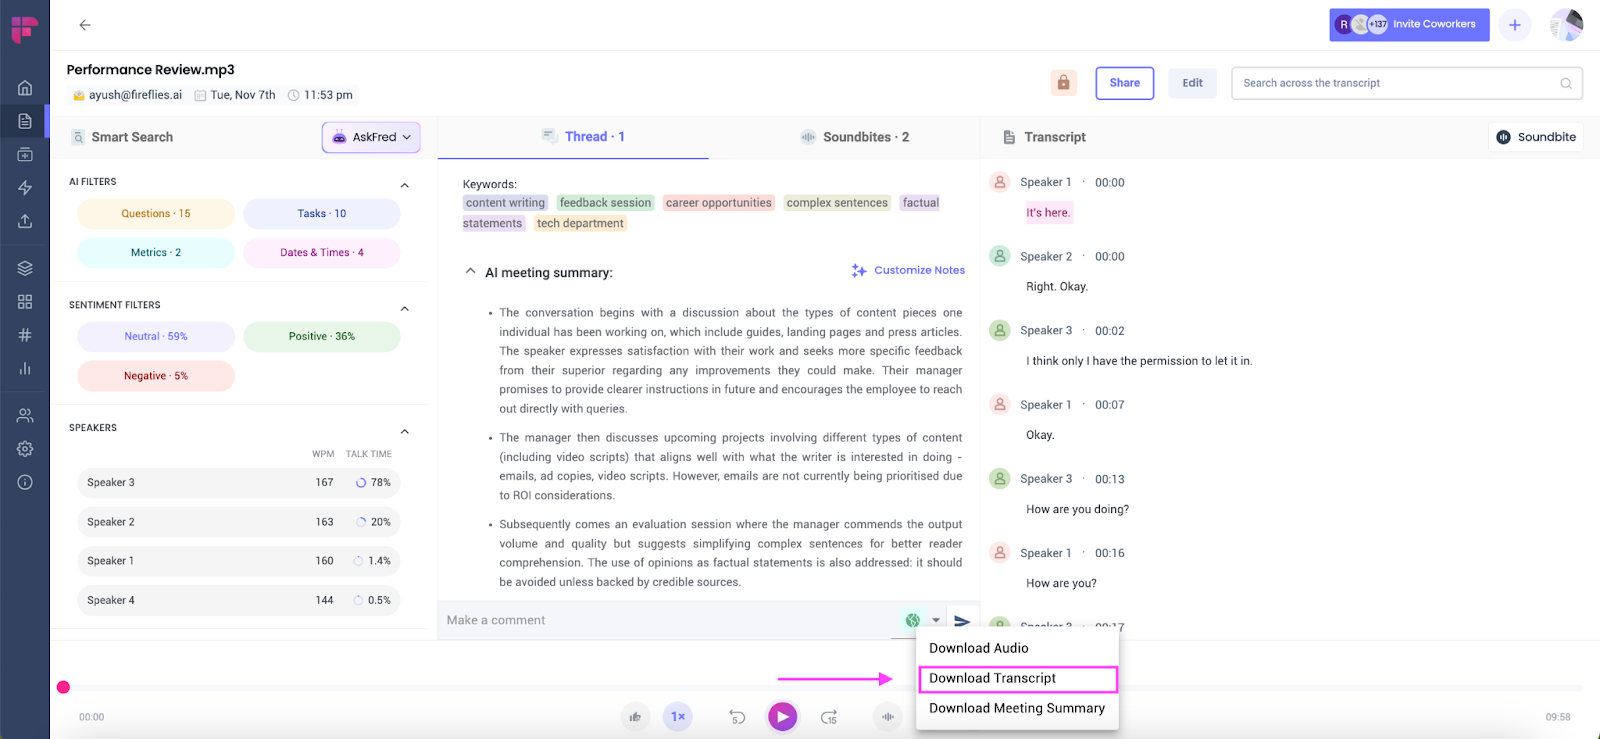
Step 6: Click Download Transcript.
Step 7: Select SRT format.
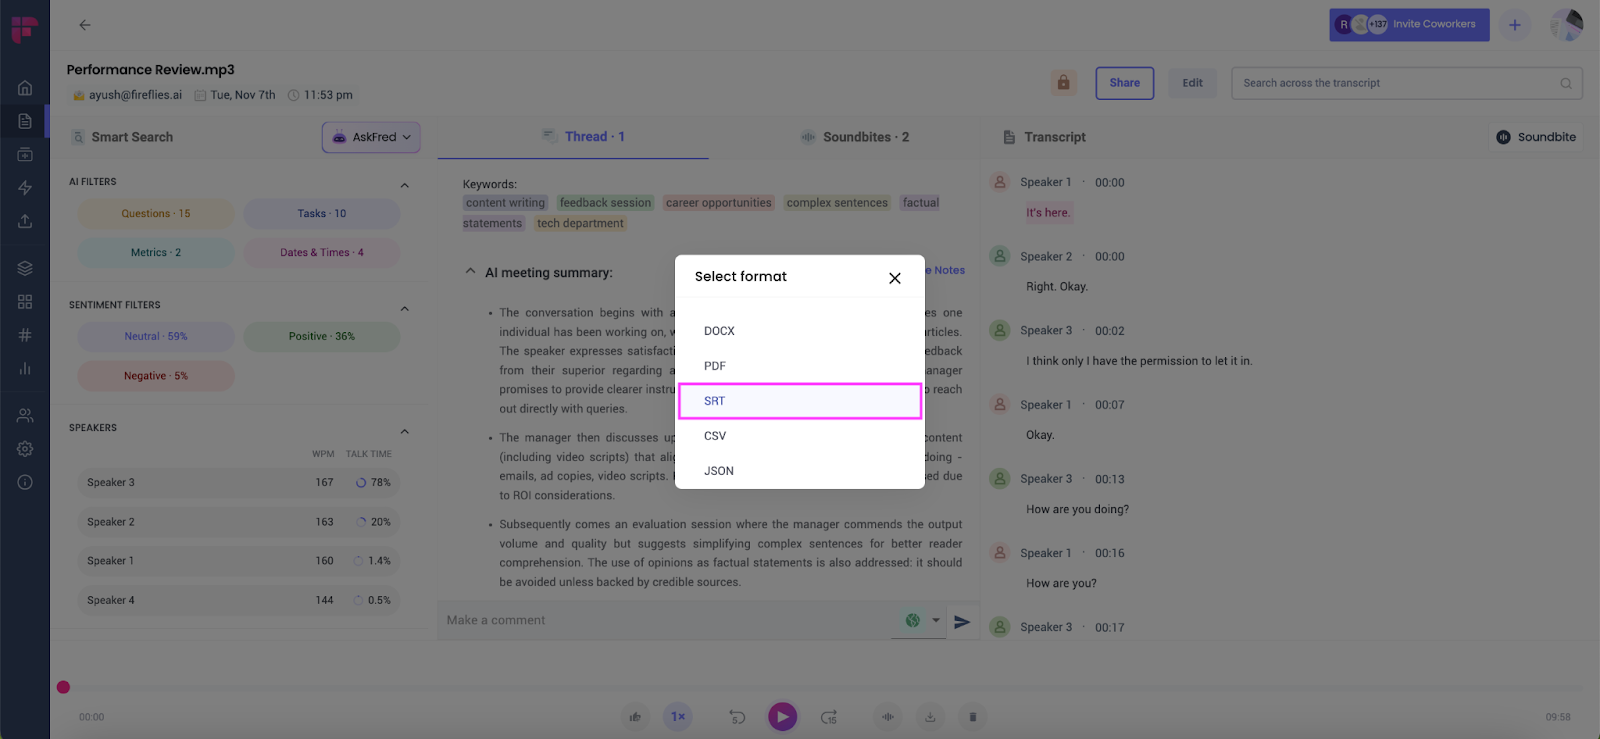
That’s it! Your transcript file is now ready.
Simply upload it to your YouTube video, ensuring your viewers enjoy it with accurate subtitles.
Final thoughts
That's a wrap, folks—you're officially subtitle-savvy on YouTube.
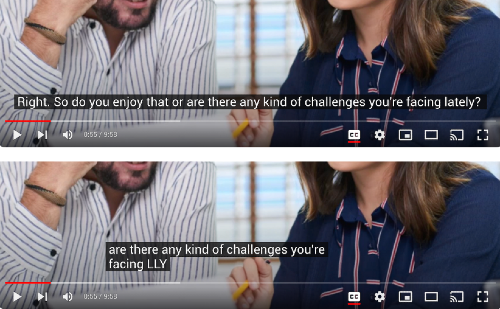
Adding transcripts to your YouTube videos is one of the most impactful optimization tactics. Transcripts make your videos more useful to viewers, accessible, and findable in search results.
While YouTube provides basic auto-generated captions, they aren't very accurate. For the best viewer experience, use a service like Fireflies.ai to create transcripts.
Fireflies’ speech-to-text technology transcribes videos with near human-level accuracy. In just minutes, you can get perfectly timed subtitle files to upload to YouTube.

![How to Download YouTube Subtitles [The Easiest Way]](/blog/content/images/size/w1000/2024/05/Copy-of-Meeting-etiquette-rules-all-professionals-must-follow---2024-05-02T130226.505.png)
![7 Top Speech-to-Text Chrome Extensions for Effortless Transcription [Free & Paid]](/blog/content/images/size/w1000/2024/04/Meeting-etiquette-rules-all-professionals-must-follow--15--1.png)