Wondering how to send a voice note on iPhone? This blog has you covered.
In this post, we’ll explain in detail:
- How to send a voice note on iPhone
- How to listen or reply to a recorded audio message
- Limitations of sending voice notes on iPhone and more!
Whether you want to give your fingers a break or communicate in a quicker, more personal way, voice messaging is a game-changer. Read on as we dive into how to master this time-saving iPhone messaging feature. You'll be recording and sending voice notes in no time!
How to send a voice note on iPhone
In this section, we’ll explore how to record and send audio messages from your iPhone’s Messaging app.
First, ensure you and the recipient are signed into iMessage. Then, follow these steps to send a voice note on iPhone:
- Open your Messaging app and select the chat
- Tap the Plus icon and select Audio
- Stop recording and send the message
1. Open your Messaging app and select the chat
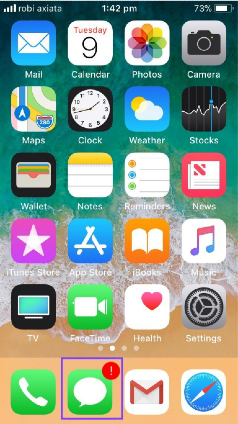
To begin, open the iMessage app on your iPhone. Select the chat or start a new one. Click the icon on the top right corner of your screen to start a new chat.
Type the name of the recipient as saved in your contacts. Select the contact.
2. Tap the Plus icon and select Audio
Once the chat opens, click the Plus icon in the bottom left corner.
This will open up a set of media options you can share in the chat.
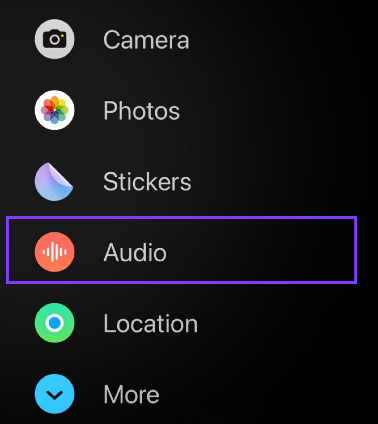
Select Audio and start speaking. The recording will automatically start.
3. Stop recording and send the message
Once you’re done speaking, tap the Stop button on the bottom right corner.
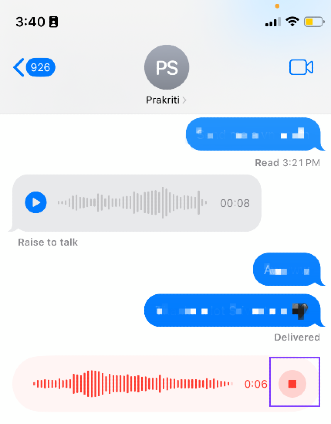
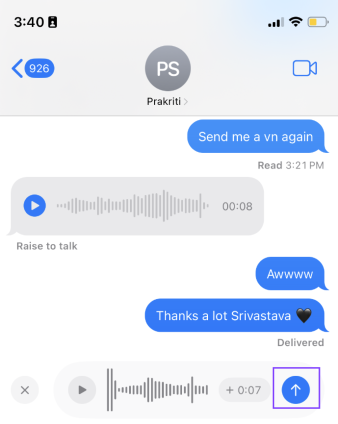
Your voice note is now ready to send. You can see two icons on either side of the message: a Play button and an Up arrow.
Tap the Play button on the left to review the message before sending it.
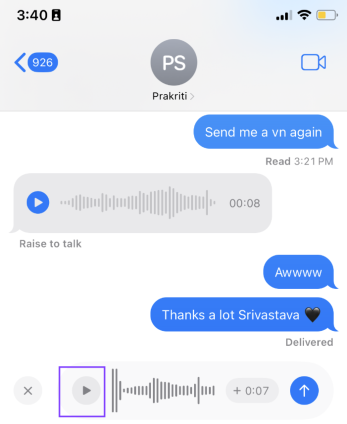
Tap the Up arrow on the right to send the message instantly. That’s it.
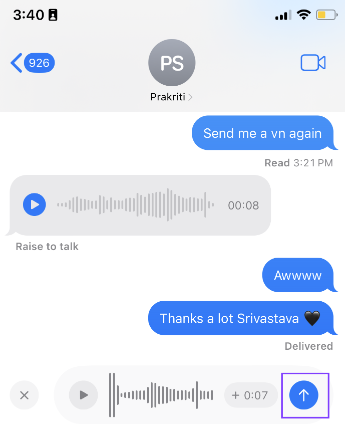
You have successfully sent a voice note on iPhone via iMessage.
How to listen or reply to a recorded audio message
Now that you know how to send a voice note on iPhone, let’s explore how to listen or reply to an audio message.
You can access the voice messages you receive via the iMessage app. Here are the steps you need to follow:
- Open the app and tap the chat with the voice message
- Tap the play button on the voice message
1. Open the app and tap the chat with the voice message
iMessage sends you a notification whenever someone sends a message. Open the app and tap on the chat to access the messages sent to you.
2. Tap the play button on the voice message
In voice messages, you can see a play icon at the start of the message. Tap on the play button to listen to the message.
You can adjust the playback speed from 1x to 2x by holding the play/pause button.
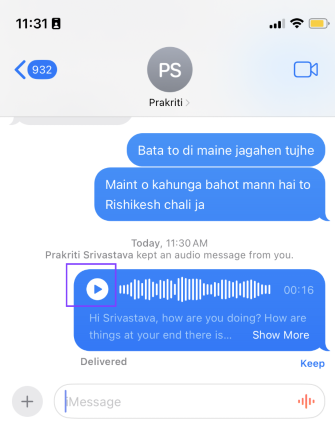
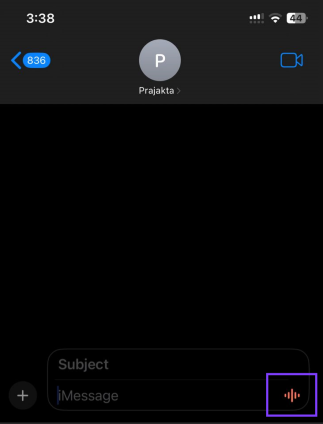
To reply to the message with a similar voice note, tap and hold the Audio icon you see on the bottom right corner of the screen and speak.
Once done, send the message by tapping on the blue arrow button.
Limitations of sending voice notes on iPhones
Though convenient, sending voice messages on iMessage has some potential drawbacks to consider:
- Lacks privacy/discretion
- Requires a stable internet connection
- Temporary in nature
- Lack of searchability
- Compatible only with iOS devices
1. Lacks privacy/discretion
Text messages are undeniably discreet and private. You can take in or send messages even in the middle of a party without causing any distractions.
Voice messages on iPhones lack this subtlety. Recording requires speaking aloud, potentially exposing private conversations to eavesdroppers nearby. Listening also causes disruptions—you must either play the message audibly or excuse yourself to plug in headphones.
Apple has attempted to address this issue for received voice notes by attaching a transcript. However, the accuracy of the transcripts is not guaranteed, especially if you have an accent.
Also, it only supports the English language at the moment.
2. Requires a stable internet connection
Voice messages require way more data than text, so they drag on and on if your network's weak. Sometimes, with weak internet, you might have to try downloading multiple times to get the full message.
3. Temporary in nature
Voice notes are temporary and get automatically deleted 2 minutes after being played unless the recipient manually taps to save it.
While this enables automatic clean-up over time, crucial details shared solely via voice note can get permanently lost if recipients don't save them.
Also, the sender has no control over saving the message. It relies entirely on the recipient taking action.
4. Lack of searchability
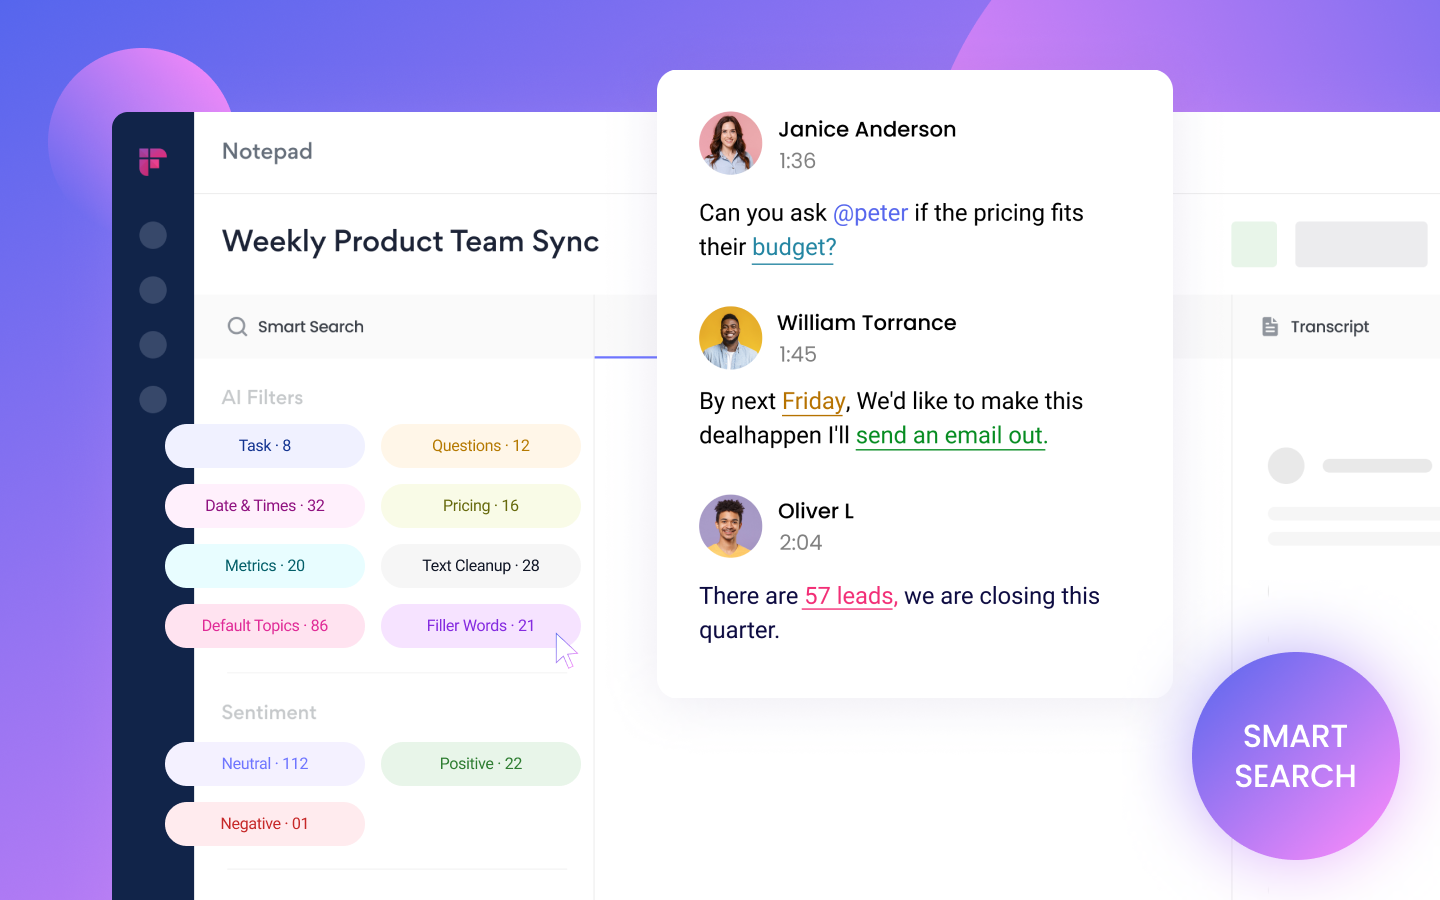
Searching voice notes for key information can be tedious and time-consuming. Unlike text messages, voice recordings cannot be easily scanned or keyword searched. To find a specific detail, you must manually listen through all saved voice messages in the conversation until you encounter it.
5. Compatible only with iOS devices
You can only send voice messages on iPhone using the iMessage app. This means you cannot use the facility to send voice messages to Android, Windows, or other smartphones.
Use Fireflies to send voice notes on iPhone
Fireflies mobile app is a convenient alternative to iMessage for recording and sharing audio notes.
Fireflies, essentially an AI-powered transcription tool, offers a mobile application version. It can record, transcribe, summarize, and analyze your conversations with 95%+ accuracy.
Read the articles—How we think about Security at Fireflies and 15 FAQs about Fireflies security for more details.
The Fireflies mobile app is available on iOS and Android phones.
There are many benefits to using the Fireflies mobile app to create audio notes, such as it lets you:
- Instantly record and share audio messages with anyone over any platform.
- Effortlessly create a searchable knowledge base of all your audio notes.
- Easily find information from past audio notes with the keyword or Smart Search feature.
- Create audio notes and their transcripts in 100+ languages, including Portuguese, Spanish, French, Arabic, German, Dutch, and Italian.
- Quickly share accurate transcription of audio files.
- Easily upload, transcribe, and document audio files in MP3, MP4, M4A, or WAV format.
- Get easily digestible analytics of your audio messages with conversation intelligence. You can further filter these insights with date ranges.
- Track the topics you mostly talk about with Topic Trackers.
- Easily organize your audio notes using Fireflies Notebook Channels and much more!
Follow these steps to record and send a voice note on iPhone using Fireflies:
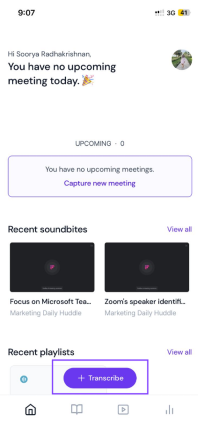
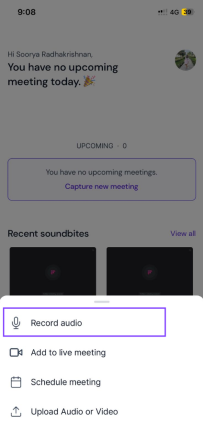
- Tap on the Transcribe button and select Record audio
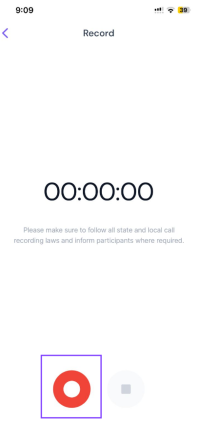
- Tap the red button to start recording
- Tap the stop icon and name your audio note
- Open your audio note and share it via email or shareable link
1. Tap on the Transcribe button and select Record audio
To begin, open the Fireflies mobile app on your iPhone. Tap the Transcribe button at the bottom of the home screen.
A set of recording options will appear. Select Record Audio from it.
2. Tap the red button to start recording
Once you select the Record Audio option, a recording screen will appear. Select the red button at the bottom to start recording and speak.
You can see the sound waves as the recording progresses. You can pause and resume the recording in between by tapping the red pause button.
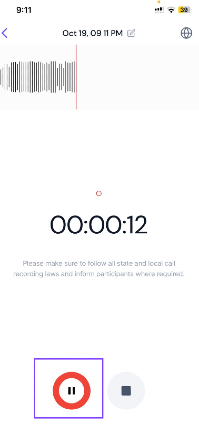
Make sure your screen remains on while recording the message.
3. Tap the stop icon and name your audio note
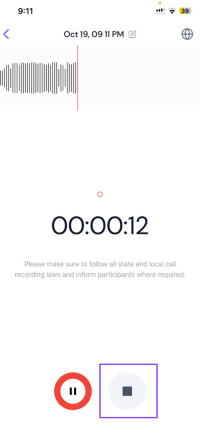
Once done recording, tap the stop icon. A window will appear where you can name and upload the recording to your Fireflies Notebook.
By default, Fireflies will name your recording with the date and time you recorded the message.
Change the name as per your preference and click Upload.
It will take a few seconds to process the recording, depending on its duration and your internet speed.
4. Share the recording via email or the shareable link
Once done, Fireflies will send you an email notification.
Click Share this recap on the email message to directly access the recording and share it via email or copy the shareable link to the recording.
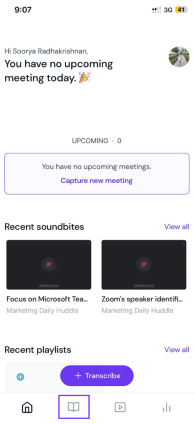
Alternatively, tap the Notebook icon to access the recording from your Fireflies Notebook.
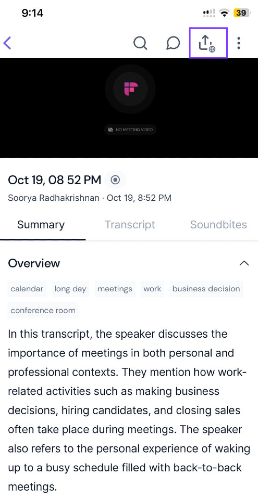
Once you open the file, select the up arrow.
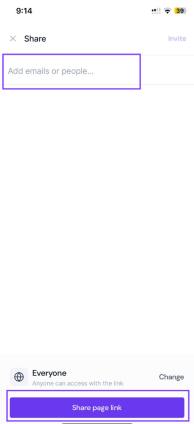
It opens a window where you can either share the file by adding the recipient’s email or copying the shareable link and forwarding it via a messaging app of your choice.
That’s it! You have now successfully sent an audio message, also while safely and effortlessly creating an easily searchable depository.
Want to create a reliable record of all your conversations for free? Sign in to Fireflies today!





![How to Download YouTube Subtitles [The Easiest Way]](/blog/content/images/size/w1000/2024/05/Copy-of-Meeting-etiquette-rules-all-professionals-must-follow---2024-05-02T130226.505.png)